Unit 2: Digital Camera Basics
In this unit you will learn about basic features and functionality of digital cameras. Pay particular attention to information about the type of camera you will be using to complete your class assignments.
Learning Outcomes
- Explain the function of various parts of digital cameras: body, viewer, lens, shutter, aperture, and picture data storage.
- Use shutter speed together with aperture to achieve desired degree of motion and desired depth of field.
- Identify basic types of cameras, including advantages and disadvantages of each.
Camera Basics
2.1: Parts of the Camera
Explain the function of various parts of a digital camera: body, viewer, lens, shutter, aperture, and picture data storage.
Every camera is made differently and, to be able to use yours correctly, you should first read the owner’s manual for your camera. The simplest cameras are called pinhole cameras. They consist of a light-tight box to contain the film, a small hole to let the image (via light) in, and a way to stop that light from coming in (usually a finger over the hole or a piece of black tape). Your camera will have a camera body (which is a light-tight box), an aperture (an adjustable hole) to let light in, and a shutter that will stop the light from coming in. Your camera will have other features like a lens to amplify the light, a viewfinder to see what you will take a photo of, a light meter to see how much light is available to you, and a memory card to store the images you take. This chapter covers some of the most basic features found on manually adjustable cameras, where you have the ability to change the aperture and shutter speed settings. If you have an automatic camera, or if you are looking to purchase a camera, make sure you can switch it to manual and that you can adjust your aperture and shutter speed.
Basic Parts of the Camera
You will be using your camera to take photos, so it is important that you know how to use it. Your camera will probably have more features than those listed in this chapter, so don’t forget to read your owner’s manual for the camera you will be using. As we discuss the parts and functions of cameras in general, have your camera and manual with you so you can locate that part or function on your specific camera and know how to use it.
Camera Body
This part of the camera has the internal image processor and the main controls for the camera. The camera body is usually rectangular in shape. Simple point and shoot cameras have a single lens that usually has a zoom feature. The high-end DSLR cameras usually have interchangeable lenses. These lenses may be a zoom lens or a fixed focal length lens. As mentioned in the introduction, the simplest camera is the pinhole camera. The body of a pinhole camera can be made of any light-tight container that can fit film. In the classes that I teach, I have seen students make pinhole camera bodies out of oatmeal boxes, small tins, garbage cans, wooden boxes, and other light-tight containers. Your camera will be much more sophisticated than these, but in reality the camera body only needs to be a light-tight container for the film or sensors in a digital camera to work. In film cameras that means once you load your film, no light should be able to get in until you want it in. Very expensive cameras have metal bodies so they won’t break as easily. Less expensive cameras have bodies made of plastic.
Aperture
One of the settings that controls exposure is called the aperture (also called the diaphragm or lens opening). The aperture controls the intensity of light that reaches your film by changing the size of the hole that lets light into your camera. Find the aperture ring or adjustment on your camera. The aperture adjustment will have numbers like ƒ 16, ƒ 11, ƒ 8, and ƒ 5.6. These numbers are known as f-stops or f numbers. They are fractions, and so the bigger the number on the bottom, the smaller the aperture opening. For example, ƒ 16 is a smaller opening than ƒ 8 because 1/16 is a smaller fraction than 1/8.
Shutter Speed
The other setting that controls exposure is called the shutter speed. It controls the length of exposure, or how long light will be allowed to enter the camera through the aperture. Find the shutter dial or adjustment on your camera. The shutter speed adjustment will have numbers like 1000, 500, 250, 125, and 60. These numbers are fractions of a second; therefore, 1/1000 of a second is much faster than 1/60 of a second.
Light Exposure
You should have two settings on your camera that will allow you to change the amount of light entering your camera body and exposing your image: aperture and shutter speed. If too much light gets into your camera, your photo will beoverexposed,and if too little light gets into your camera, your photo will beunderexposed. If you understand how to control exposure, you will be able to take perfectly exposed photographs every time with the right equipment. Before you depress the shutter release on your camera you should set aperture and shutter speed to be sure your exposure is correct.
Light Meter
Most cameras have an internal light metering system that can measure the light coming in so you, or in the case of cameras with auto exposure (see your owner’s manual for auto exposures like shutter-priority, aperture-priority, or full auto exposure) the camera, can set the correct aperture and shutter speed to get the correct exposure. There are several types of light meters, but the type that is usually built into a camera is called a reflected light meter. It averages all the lights and darks reflected back to the camera from the subject and then calculates a shutter speed and aperture combination that will produce middle gray in a print.
This system works well for most scenes, because your subjects will have equal amounts of darks and lights. However, this type of metering will have poor results in subjects that are very light or are very dark. For example, say you want to take a photo of some eggs on a light-toned tablecloth. The light meter will assume that your subject has a balance of lights and darks and since it does not, your settings will be incorrect. If you were to meter bell peppers on black velvet, your light meter would again give you incorrect settings. Instead of white eggs in the first example, you would have middle-gray toned eggs, and your peppers on black velvet would appear middle-gray in the final print if you were to use the settings given by your light meter.
When you meter a scene that you believe will give you false settings, you have several options. You can use a neutral gray test card—a middle-gray piece of paper you can buy at a photography store—by holding it up in front of the scene you wish to shoot and meter on the card instead. Dark skin is about the same tone as the neutral gray test card and average light-toned skin is one stop(explanation below) lighter. Meter on your hand by holding it up in front of the scene to be metered, you may need to get closer to the subject to make sure your hand has the same lighting conditions as the scene and then back up to take the photo. If your skin is dark, then no adjustments need to be made. If your skin is light-toned, then add one stop of light. One stop of light is created by either opening up the aperture by one whole stop, i.e., ƒ 16 to ƒ 11, or by doubling the shutter speed time, i.e., 1/500 of a second to 1/250 of a second. If your skin is extremely light, then you may need to open up two full stops.
Other hard-to-meter scenes include a subject with a very light background, like a bright sky. In this case, meter on the subject only, rather than the subject and background together. By doing this you will prevent your subject from showing up as only a silhouette.
The Steps to Metering
To set the metering on your camera, use the ISO setting. (ISO is an acronym for International Organization of Standardization.) The ISO is the sensitivity of the camera sensors to light. The lower the ISO number is, the less sensitive the sensor is to light. A basic rule to use for an ISO setting is to use 100 ISO for brightly lit outdoor scenes and 400 ISO for scenes with less light.
Set the camera to the desired exposure mode, that is, manual exposure (you set both shutter speed and aperture), shutter priority (you set the shutter speed and the camera will set the correct aperture), aperture priority (you set aperture and the camera will set the correct shutter speed), or programmed automatic exposure (the camera will set both the correct aperture and shutter speed). Note that your camera may have only manual exposure available or any combination of the aforementioned exposure modes.
Meter your scene by looking through the viewfinder and activating the meter (see your owner’s manual on how to activate your meter). If your camera has no light meter, you can refer to the suggested aperture and shutter speed settings that are usually found in the owner’s manual.
Determine if your scene has a balance of lights and darks or grays. If not, then meter on a gray card or use your hand as described above. In the case of a very bright background, meter on the subject only by getting closer to the subject, metering, setting your exposure at that location, and then returning to your original location.
Set the aperture and shutter speed for correct exposure and depress the shutter release. Note: Usually, a tripod is used for exposures longer than 1/60 of a second, using a normal focal length lens, to reduce blur caused by motion.
Do I Have More Choices Than the One My Light Meter Tells Me?
Since the aperture and shutter speed both control the amount of light that enters into the camera, once you know a combination of the two that will give you a correct exposure, you can change one setting as long as you change the other the opposite way. This is known as the Law of Reciprocity.
We have two controllers of light on the camera, the aperture and the shutter speed. If I open up the aperture one stop, say, from ƒ 8 to ƒ 5.6, what I am doing is letting twice the amount of light (in intensity) into the camera. If I close down the shutter speed from 1/60 of a second to 1/125 of a second, I am letting half the amount of light in (in time). Therefore, if my light meter shows that I will get a correct exposure if I set my aperture at ƒ 8 and my shutter speed to 1/60, I can also use a setting of ƒ 5.6 and 1/125 because both exposures are equivalent. The amount of light entering the camera is the same even though the settings may be different.
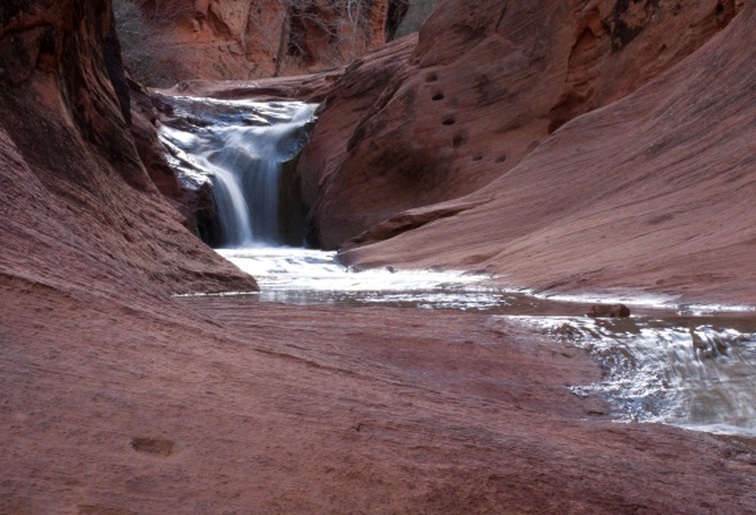
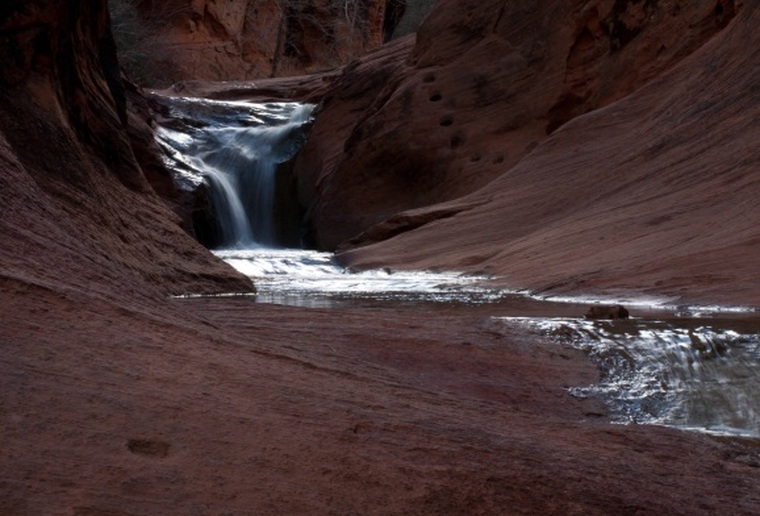
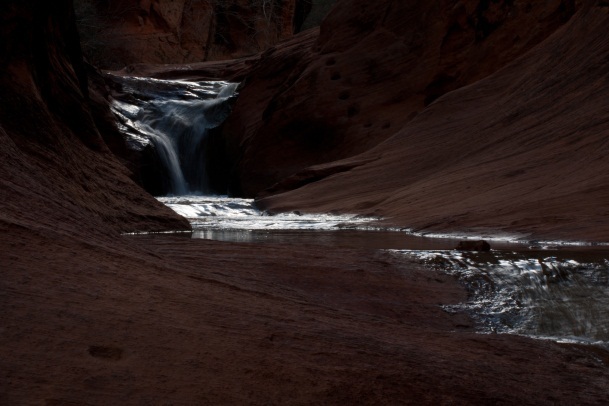
The four images shown are examples of how changing the exposure will affect the light in the picture. Picture #1 is 1/250 second, picture #2 is 1/125 second, picture #3 is 1/60 second, and picture #4 is 1/30 second. All four pictures are exposed with the same ƒ 8.
We have two controllers of light on the camera, the aperture and the shutter speed. If I open up the aperture one stop, say, from ƒ 8 to ƒ 5.6, what I am doing is letting twice the amount of light (in intensity) into the camera. If I close down the shutter speed from 1/60 of a second to 1/125 of a second, I am letting half the amount of light in (in time). Therefore, if my light meter shows that I will get a correct exposure if I set my aperture at ƒ 8 and my shutter speed to 1/60, I can also use a setting of ƒ 5.6 and 1/125 because both exposures are equivalent. The amount of light entering the camera is the same even though the settings may be different.
The four images shown are examples of how changing the exposure will affect the light in the picture. Picture #1 is 1/250 second, picture #2 is 1/125 second, picture #3 is 1/60 second, and picture #4 is 1/30 second. All four pictures are exposed with the same ƒ 8.
Exposure 1/250 (Picture 1)
Exposure 1/125 (Picture 2)
Exposure 1/60 (Picture 3)
Exposure 1/30 (Picture 4)
Why Would I Ever Want to Change My Settings Using the Law of Reciprocity?
You will want to have flexibility. In some lighting conditions and with some lenses, one combination of settings given by the light meter may not be available. Alternate settings allow you to have options while still having the correct exposure. In 2.2 you will learn that besides controlling exposure, aperture also controls depth of field, and shutter speed controls subject movement.
Lens
Basically, all camera lenses do the same thing: they collect light from an image and project it onto film. However, by controlling the focal length (the distance from the optical center of the lens to the focal plane when the lens is focused on infinity) of the lens (usually this technical stuff can be described as the length of the lens), the photographer can control magnification, and angle of view(or the amount of the scene that will show up on the film). Lenses can be automatic focusing or manual focusing, depending on the type of camera and options available for it.
Lenses can be divided into the following five basic types:
Lenses can be divided into the following five basic types:
Normal Lenses

A normal lens is also called a standard lens. This is the type that you will probably use the most, especially in beginning photography. For a DSLR camera, a normal focal length lens is 50 mm. A 50 mm lens on a DSLR camera will approximate the vision of the human eye. It “sees” the world about how you see it.
Telephoto Lenses
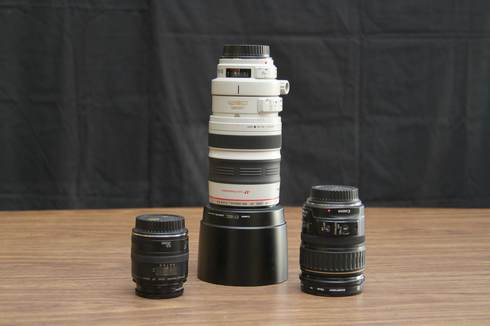
These lenses have focal lengths that are longer than the normal lens. Common telephoto focal length lenses for a DSLR camera include 85 mm, 105 mm (often used as a head-and-shoulders portrait lens), 135 mm, 200 mm, 300 mm, 400 mm, 500 mm, 600 mm, 1000 mm, and 1200 mm. The longer the focal length of a telephoto lens, the greater the magnification and the narrower the angle of view. That means that faraway objects will appear closer (telephoto lenses are great to photograph sports and wildlife) but some of the scene will be cropped out of the photo. Telephoto lenses reduce the differences in the size of objects that are in the foreground and the background, this effect is known as “telephoto compression.” This means that objects in the foreground appear to be closer to the background than they really are.
Some drawbacks to consider before purchasing a telephoto lens are that telephoto lenses tend to be bulkier and more expensive than normal lenses. Focusing must be made more accurately with a telephoto lens because they create a shallower depth of field than a normal lens. They are usually slower than normal lenses. Speed, when discussing lenses, refers to the widest aperture opening capable for that lens.
Telephoto lenses allow less light through them, requiring longer shutter speed times than normal lenses, unless you pay more money for a faster lens. Telephoto lenses also magnify movement and a tripod is useful to stop blurred movement caused by the photographer.
Wide-Angle Lenses
These lenses have focal lengths that are shorter than normal lenses. Some common wide-angle lenses used in 35 mm film photography include 35 mm, 28 mm, 24 mm, 20 mm, and the “fisheye” lenses under 20 mm in length that produce distorted images.
These short focal-length lenses produce images that capture a wide angle of view and tend to push the foreground further from the background, adding depth and perspective. Wide-angle lenses create photographs that have more depth of field, which can allow the photographer more room for error when focusing. In fact, some fisheyes can’t even be focused because they have such a great depth of field that everything from as close as touching the lens to infinity will be in focus. However, for good or bad, these lenses create a great deal of distortion.
Wide-angle lenses are great for panoramas, in tight quarters, and where distortion is required. A fisheye can be useful for special effects.
Zoom Lenses
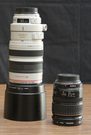
These lenses do not have a fixed focal length. A zoom lens that can be adjusted from 35 mm to 105 mm is like owning a 35 mm lens, a 105 mm lens, and all the lenses in between. This can save the photographer money, but zoom lenses do have their disadvantages. Zoom lenses tend to be even bulkier and slower than their fixed focal length equivalent, and are generally not as sharp.
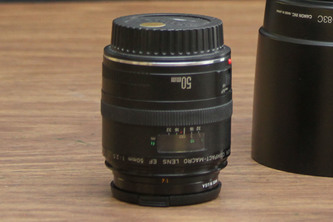
Macro Lenses
These lenses are often found as a mode on a zoom lens. They are used for close-up photography.
Insert Photo macro lens – need pic of Zoom lens possibly from clip art
Insert Photo macro lens – need pic of Zoom lens possibly from clip art
Viewfinder
A photographer usually uses the viewfinder as a format to compose her photograph. This composing of the photograph should be considered before releasing the shutter (see the lesson on composition for more information on composing your photograph).
You will use your viewfinder to help you focus on the most important part of the scene. Some common focusing aids on single lens reflex cameras include ground glass focusing (an etched glass screen on which the image can be focused), micro-prism (a circle that appears coarsely dotted until focused), and split-imagefocusing (that offsets the subject until it is focused).
You will find a rangefinder system focusing system on a rangefinder camera (see 2.3 for information on the rangefinder) that operates by superimposing two images of the same subject. The lens is focused sharply on the subject when the two images appear exactly superimposed.
Parallax effect is a discrepancy between what the photographer sees through the viewfinder and what the lens records on the sensor. Parallax effect is not a problem with single-lens reflex cameras because the photographer is actually looking at the scene through the lens in such cameras. However, because the viewfinder is offset from the lens in rangefinder cameras, twin-lens reflexcameras (see 2.3), and in point-and-shoot cameras (see “simple cameras” in 2.3), what the photographer is looking at may not be exactly what the camera sees, especially when the camera is close to the subject.
Your viewfinder may also contain information about exposure from your light meter. Remember to find out how to use the features on your particular camera by reading the owner’s manual.
2.2: Shutter Speed
Use shutter speed together with aperture to achieve desired degree of motion and desired depth of field in your photograph.
Using Shutter Speed and Aperture Together
You already know that the aperture and shutter speed control the amount of light that enters the camera, but each of them also affects the image sharpness. The aperture affects the depth of field, the sharpness from near to far, while the shutter speed affects the sharpness of the moving subject.
Shutter speed 1
Shutter speed 1/2
Shutter speed 1/4
Shutter speed 1/15
Shutter speed 1/30
Shutter speed 1/60
Shutter speed 1/125
Shutter speed 1/250
Shutter speed 1/500

Shutter speed 1/1000
Aperture and Depth of Field
The larger the aperture is, the more shallow the depth of field. Say, for example, you are taking a photograph of someone’s head. If you were using a very large aperture setting and were to focus on the subject’s eyes, nose, and hair, certainly the background would not be as sharp as the eyes. If you were to use a small aperture and focus on the subject’s eyes, you would produce an image that could be entirely in focus, including the background.
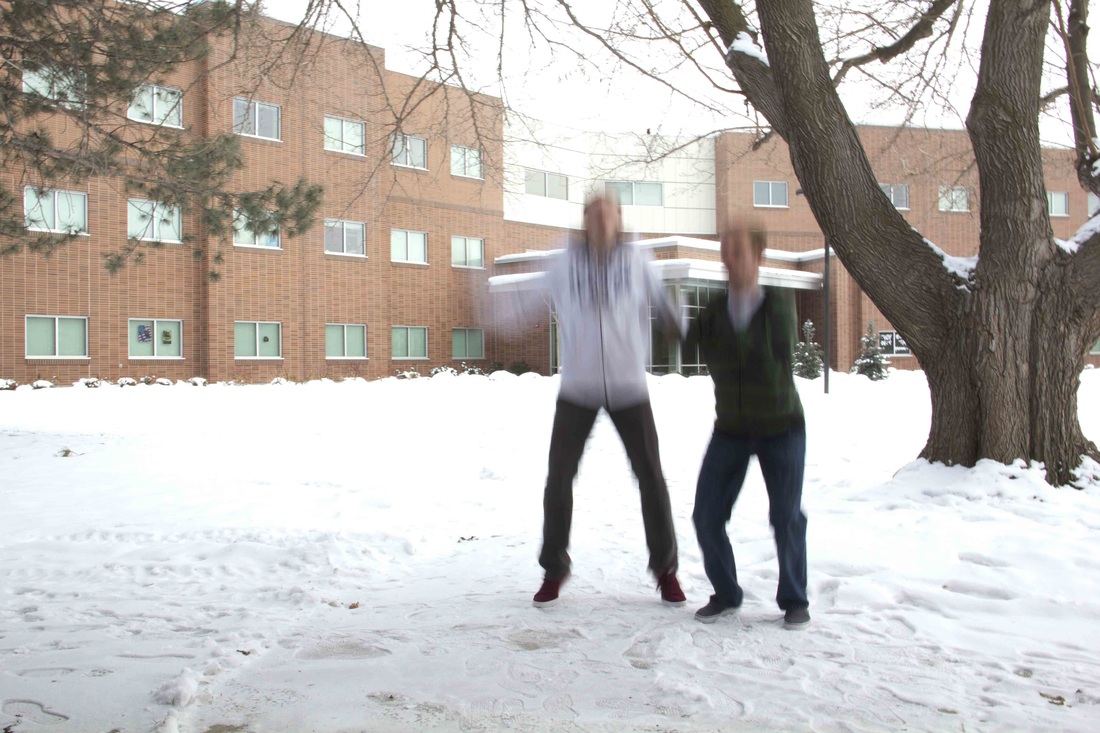
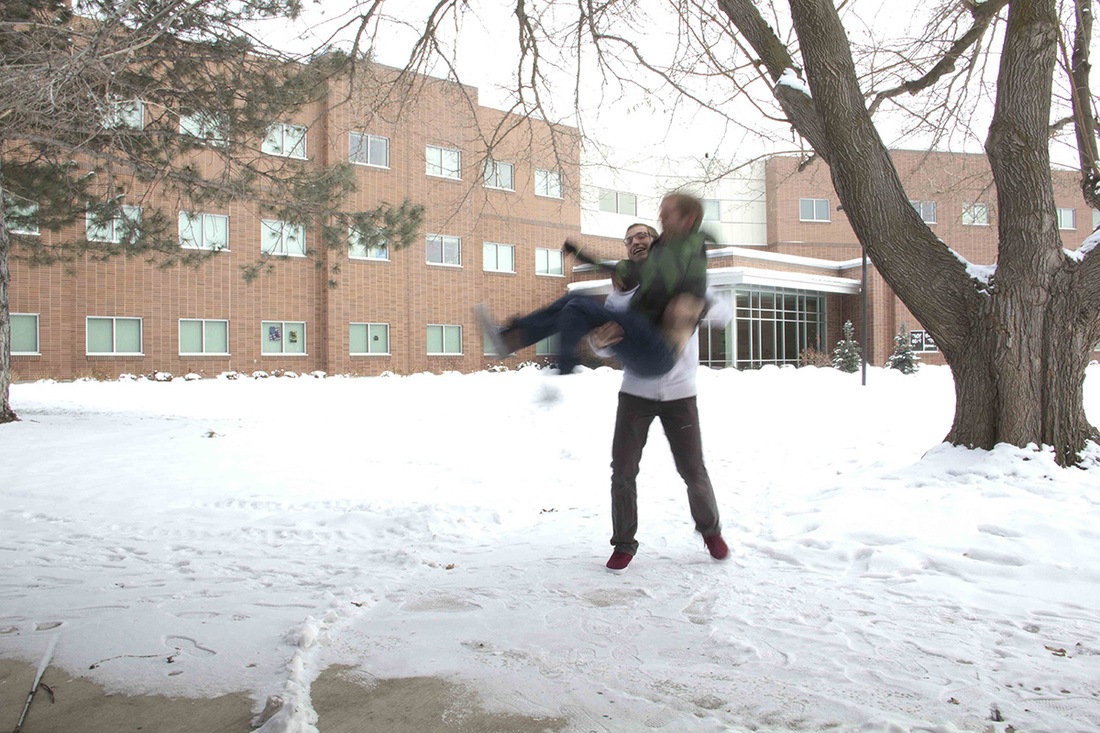
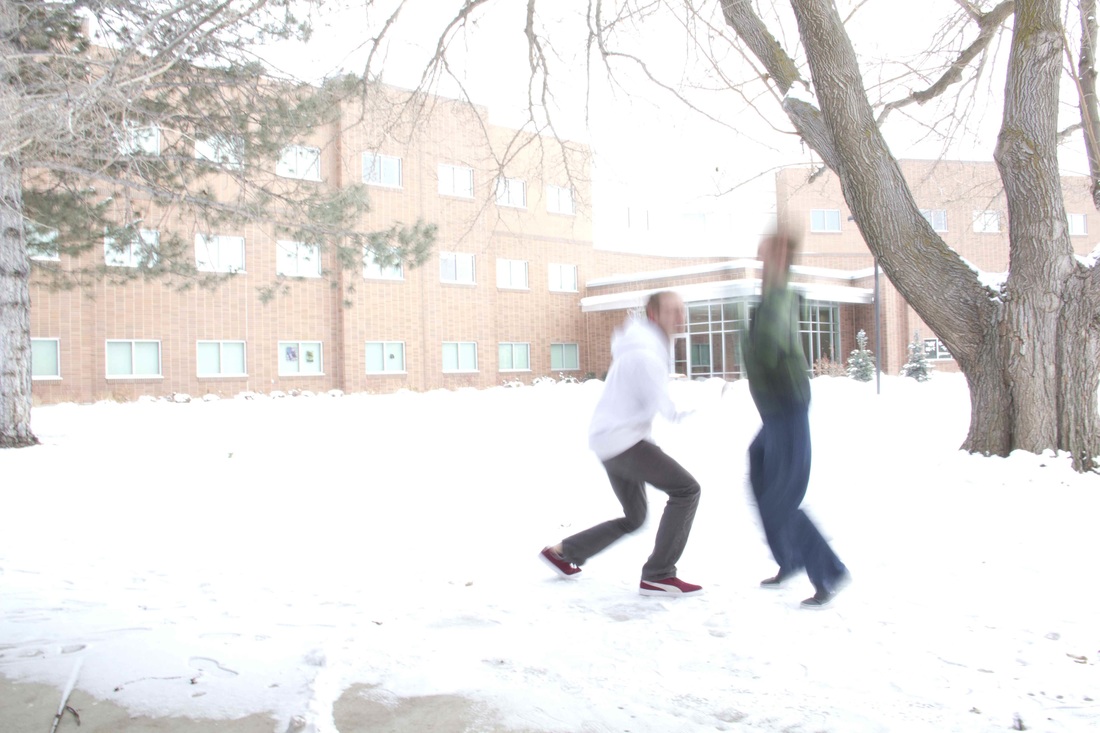
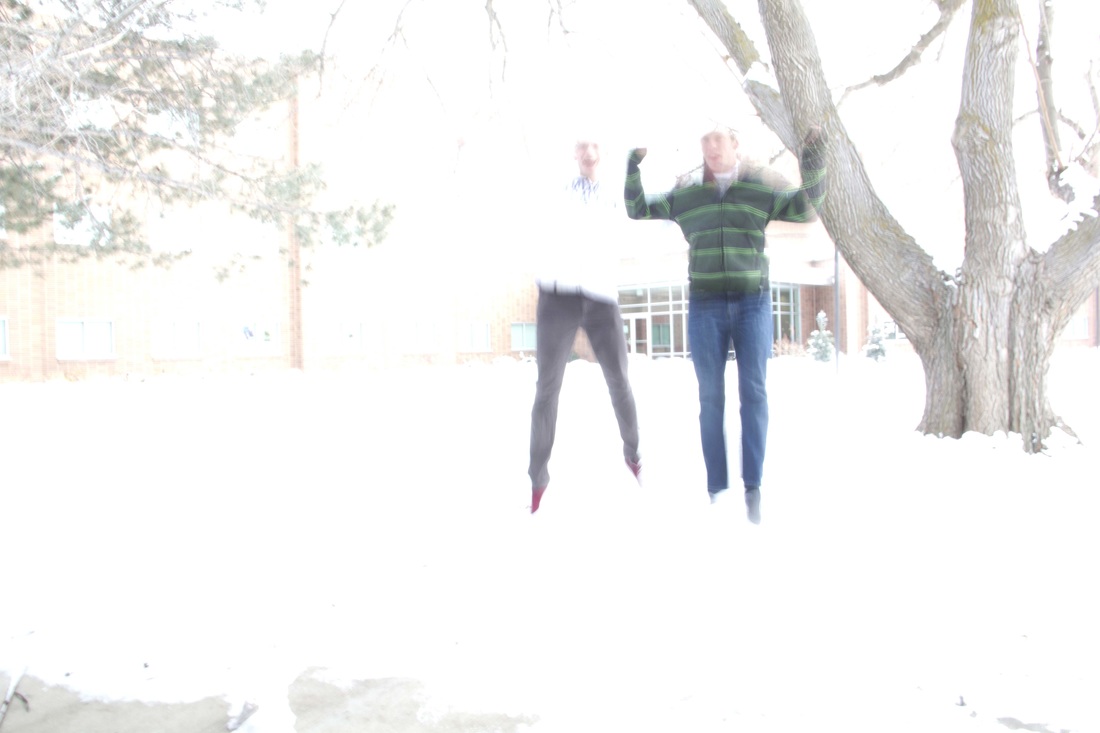
Shutter Speed and Subject Movement
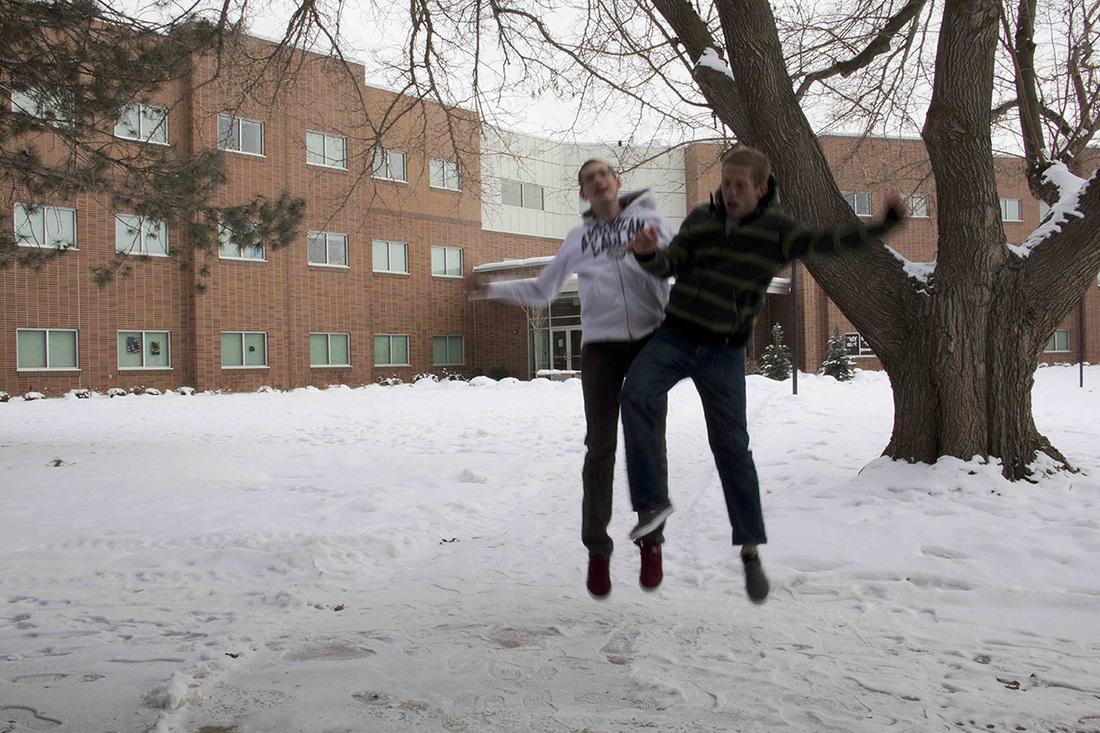
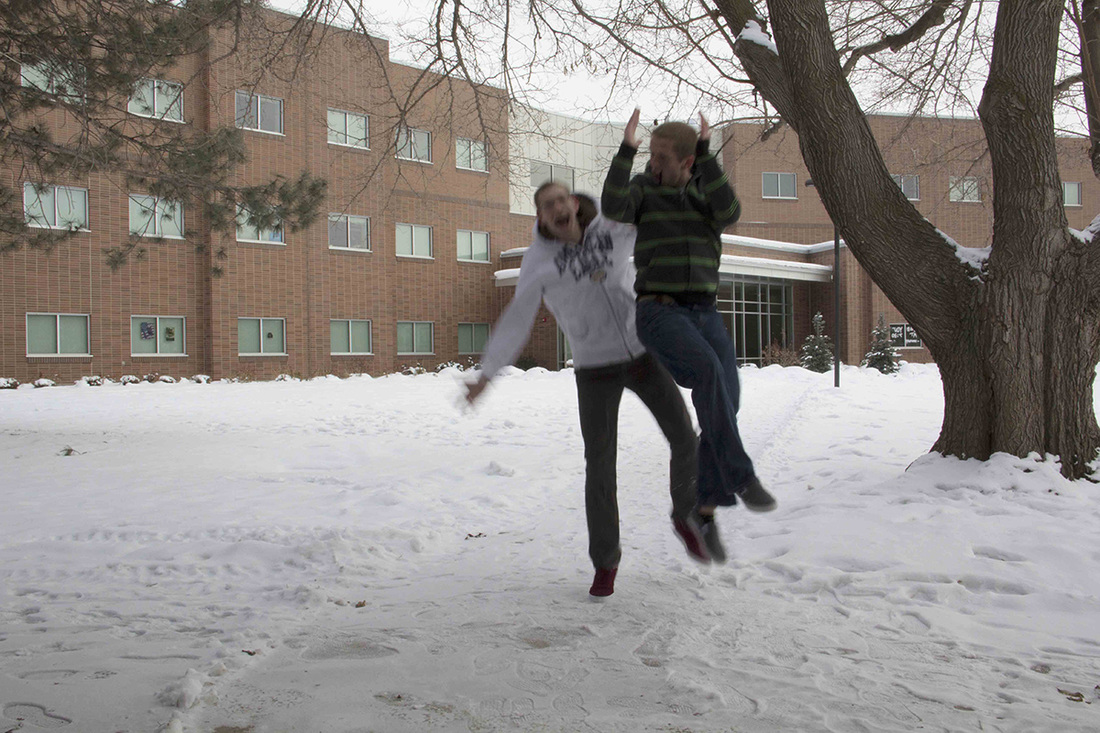
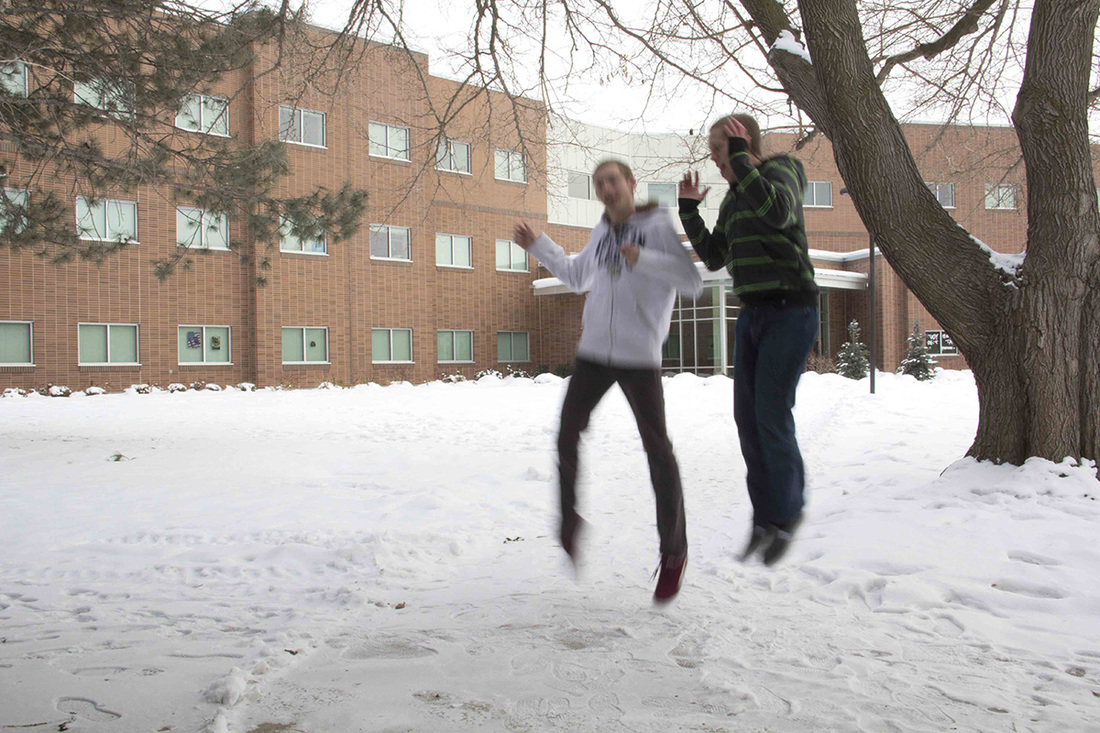
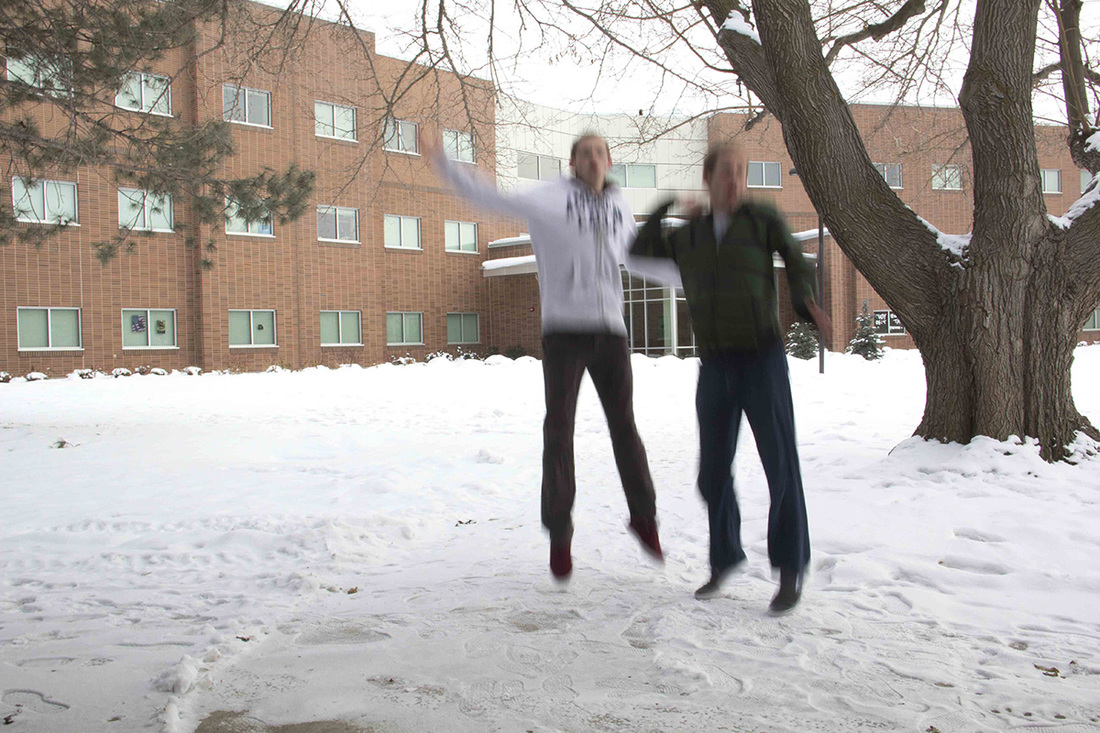
The slower the shutter speed, the more movement will be shown. Conversely, the faster the shutter speed, the less movement will be shown. Therefore, the photographer can decide if the water coming out of a faucet should be “frozen” by using a fast shutter speed (see figure 1.17), or if it should rush past in a blur by use of a slow shutter speed (see figure 1.16). Since camera movement from the photographer can be seen when using slow shutter speeds, the use of a tripod is generally necessary when using shutter speeds slower than 1/60 of a second when using a normal lens. Telephoto lenses require a tripod at an even faster speed (1/125 or 1/250).
Can I Create an Image with Both a “Deep Depth of Field” and “Stopped Motion?”
Once you find out an exposure that is correct for the scene you desire to photograph, you can change one of your settings, as long as you change the other the opposite way. Because each shutter speed lets in twice as much light as the next faster speed, and each aperture setting lets in twice as much light as the next smaller size, you can use a faster shutter speed as long as you use a larger aperture, and vice versa. Therefore, you usually need to sacrifice depth of field for shutter speed. In other words, if you want to stop the motion of the water running from a faucet and put your shutter on a faster speed, you will have to open up your aperture, thereby producing a photo with a shallower depth of field.
Depth of field
|
Stopped motion
|
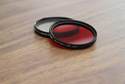
If, however, you have a lot of available light, so much that you must both close down your aperture and stop down your shutter speed to produce the correct exposure, you would produce an image that would contain both stop motion and a deep depth of field. If you desired to produce an image that had blurred movement or a shallow depth of field in the same lighting conditions, you would have to block out some of the light entering your camera by placing a neutral density filter over your lens or by changing your film’s sensitivity to light.
< Filters
< Filters
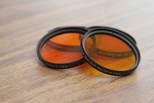
A neutral density filter acts as sunglasses for your camera, letting in less light. You would fit the filter over your lens to block out some of the excess light which would allow you to open up your aperture or to slow your shutter speed and create the affects you desire. In lesson 3 you will learn more about photographic film; however, it is important to know right away that the film speed rating, or ASA/ISO, is related to its sensitivity to light.
Intriguing Question
I can stop the movement of the subject with a fast shutter speed, and I can allow the movement of the subject to show with a slow shutter speed, but can I stop the movement of the subject and have the background be blurred?
To make the subject appear like it is racing past the viewer requires the use of a technique called panning. To pan an image, set your exposure using a relatively slow shutter speed (this is relative to the subject movement but start with a speed close to 1/30 of a second). Follow the subject through your viewfinder at about the same speed as the subject is moving. Release your shutter as the subject passes you. Your subject should be in focus, while the background will be blurred. Panning can take some practice in order to keep the subject in the viewfinder, move at the same speed as the subject, and set the shutter to the correct speed.
To make the subject appear like it is racing past the viewer requires the use of a technique called panning. To pan an image, set your exposure using a relatively slow shutter speed (this is relative to the subject movement but start with a speed close to 1/30 of a second). Follow the subject through your viewfinder at about the same speed as the subject is moving. Release your shutter as the subject passes you. Your subject should be in focus, while the background will be blurred. Panning can take some practice in order to keep the subject in the viewfinder, move at the same speed as the subject, and set the shutter to the correct speed.
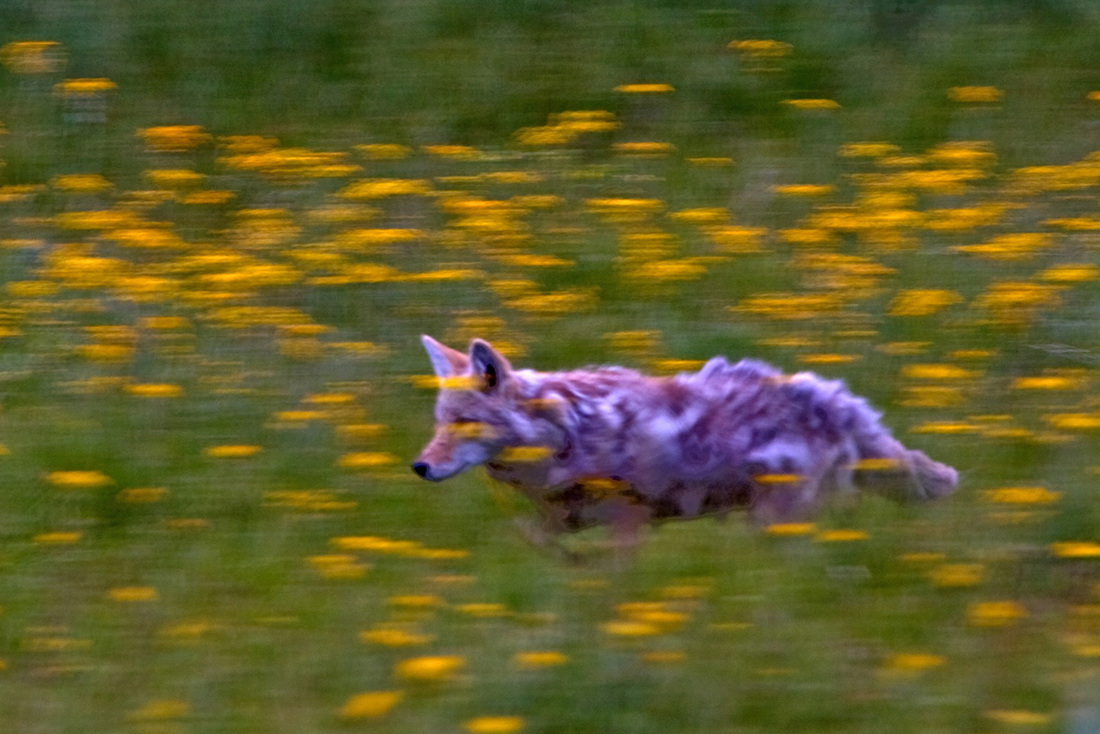
Panning
2.3: Basic Types of Cameras
Identify the basic types of cameras and list the advantages and disadvantages of each.
Basic Types of Cameras
There are five basic types of cameras that we will be discussing. There is the point-and-shoot camera, the rangefinder camera, the twin-lens reflex camera, the single-lens reflex camera, and the view camera. There are also various sizes or formats of film available to different cameras. The size of film will determine the size of your negative, which will produce your photographic image. Bigger negatives can hold more information on them and therefore are able to produce images that can be enlarged without losing detail. We will be discussing three sizes, or formats, of film: 35 mm, the most common film size, medium format film, which is about four times as large as 35 mm film, and large format sheet film, which can be 4" x 5" and larger.
Point-and-Shoot Cameras
As the name implies, “point-and-shoot” cameras do everything. The photographer merely drops the film into the camera. The camera will then read the speed of the film and advance to the first frame. You look through the viewfinder, compose the image, and the camera will focus, calculate exposure, add flash if needed, advance the film after exposure, and rewind the film at the end of the roll.
35 mm
35 mm
- Advantages—Relatively inexpensive, automatic “everything,” easy to use, lightweight, compact, convenient, some offer zoom capabilities, no other equipment needed.
- Disadvantages—Cannot take quality photos in some conditions, fixed aperture and shutter speeds mean that the photographer cannot control depth-of-field nor subject movement, lenses cannot be changed for angle of view or close-up photography, small negative.
Rangefinder Cameras
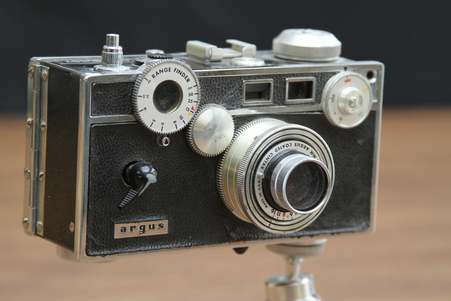
Rangefinder cameras are small and light. They can be identified by their viewfinder and focusing system, which is known as a “rangefinder.” The viewfinder of a rangefinder looks over the lens to the subject, not through the lens. To focus the rangefinder, the photographer will see a ghost image of the subject until the lens is focused correctly. This is called a super-imposed focusing system.
35 mm
35 mm
- Advantages—Lightweight, adjustable aperture and shutter speeds allow for more flexibility than point-and-shoot cameras, changeable lenses of superior quality in good models, fast and precise focusing, quiet shutter.
- Disadvantages—Good models are usually expensive, the viewfinder does not see what the lens is seeing and parallax can be a problem with close-up photography, small negative.
- Advantages and disadvantages—Similar to the 35mm rangefinder except that the medium format rangefinder carries 2 1/4" film to offer a larger negative.
Twin-Lens Reflex Cameras (TLR)
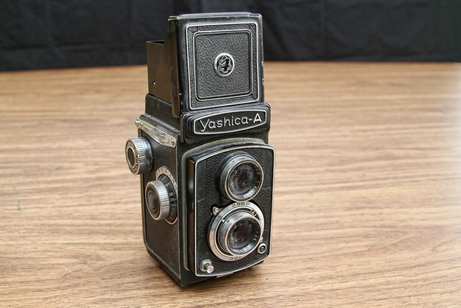
These cameras look like elongated boxes with two lenses mounted on the front. One of the lenses is for the photographer to look out of and the other is used to capture the image. The viewfinder is usually located on the top of the camera and it takes up the entire top of the camera. The photographer holds the camera at his or her waist and then looks down into the viewfinder to see the subject.
Medium Format
Medium Format
- Advantages—Large 2 1/4" negative, quiet, generally not as expensive as other types of medium format cameras, sturdy and reliable, large viewfinder.
- Disadvantages—Not as fast as a rangefinder nor as flexible as an SLR, few models offer changeable lenses, these lenses are expensive, waist-level viewfinder shows the image backwards, there are few models made.
Single-Lens Reflex Cameras (SLR)
These cameras offer the greatest number of changeable lenses and features. They are usually the “norm” when purchasing a new camera for a photography class. If you take off the lens to a single-lens reflex camera you will see a mirror set at a 45 degree angle. The mirror allows the photographer to see the subject through the lens. The mirror flips up when the shutter is released to allow exposure of the image onto the film.
35 mm
35 mm
- Advantages—Wide variety of changeable lenses, wide variety of models with a variety of features and functions, through-the-lens metering and viewing, parallax is not a problem.
- Disadvantages—SLRs are often not as quiet as rangefinders, TLRs, and view cameras, small 35 mm negative requires sharp focusing, careful exposure and processing for high-quality enlargements.
- Advantages—Same advantages as the 35mm SLR with the added bonus of a larger negative, some offer changeable camera backs.
- Disadvantages—Heavier, bulkier, noisier, and more expensive than the 35mm SLRs.
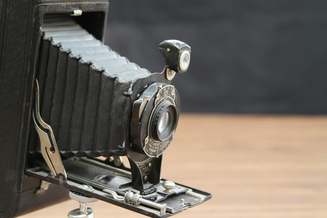
View Cameras
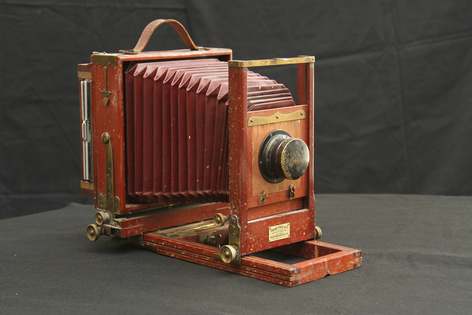
The view camera gives you the most control over your image. It also offers the largest of negatives. It is so big, however, that it must be mounted onto a tripod. The whole back of a view camera is the viewfinder. Some photographers cover the viewfinder with a dark cloth and then peek under the cloth to more accurately focus the image. It is usually used by landscape photography or in the studio.
4" x 5" and Larger
4" x 5" and Larger
- Advantages—Large negative for quality enlargements, single sheet film allows for precise exposure and processing for each exposure, film plane and lens can be shifted or tilted to change perspective or plane of focus.
- Disadvantages—Very bulky, heavy, and expensive, a tripod is required to support the camera, time consuming to set up and operate.
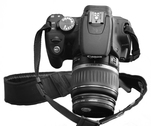
The Digital Camera
The digital camera is very similar to the film camera. It has a lens to allow light into the camera, shutter speeds to control how long the light is allowed to enter the camera, and a black box to record the image. The basic difference between the film camera and the digital camera is how the picture image is recorded. The film camera records the image onto film. The digital camera records the image onto a memory card as electronic data.
Look at your digital camera and the owner’s manual and become familiar with the features that have been included. Answer the following questions about your camera that you will be using in the class.
Look at your digital camera and the owner’s manual and become familiar with the features that have been included. Answer the following questions about your camera that you will be using in the class.
- Is your camera a point-and-shoot or a DSLR camera?
- What is the camera brand and model?
- Does your camera have image stabilization?
- What is the purpose of image stabilization?
- How close can you get to a subject and still be in focus?
- If you have a point and shoot camera, what is the power of the optical zoom?
- Does your camera have a viewfinder?
- Is there a depth of field preview button on your camera?
- Where is the on and off button for your camera?
- What type of memory card does your camera use?
- Does your camera have rechargeable batteries or do you need replacement batteries?
- If you have rechargeable batteries, how long does it take to recharge?
- Where is the playback button on your camera?
- Explain how to delete a picture on your camera.
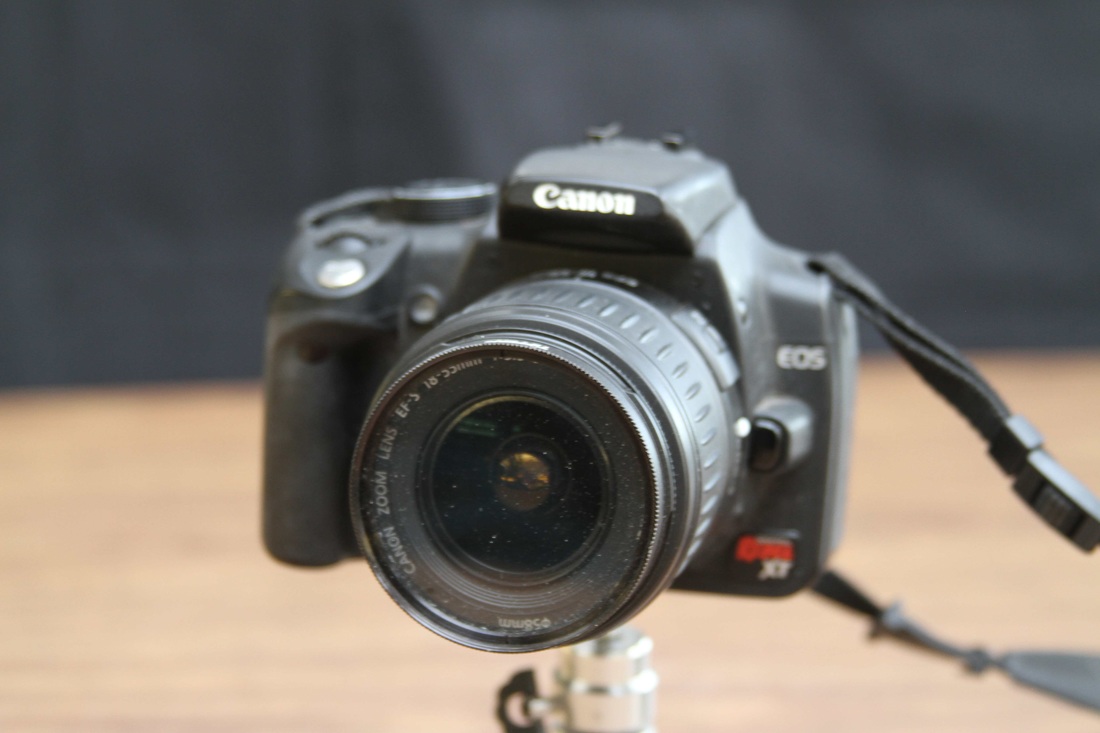
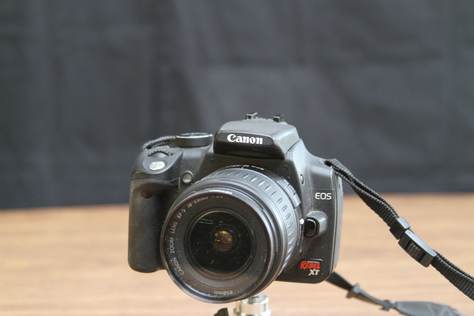
Front of a digital camera
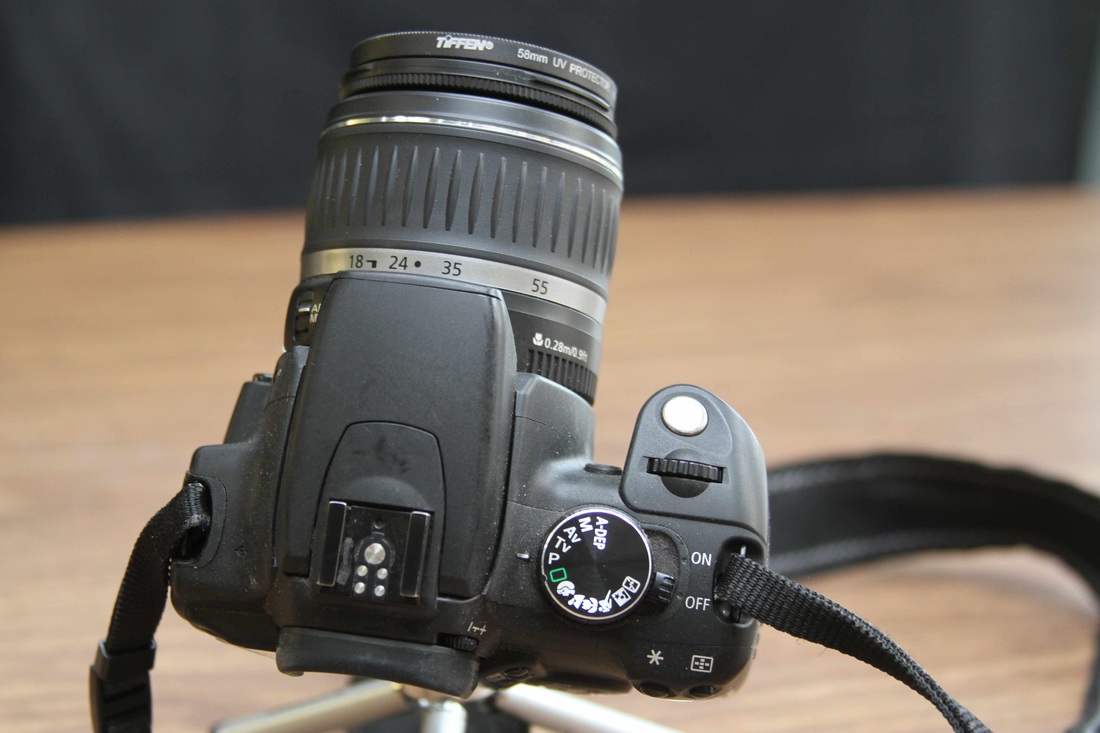
Top of a digital camera
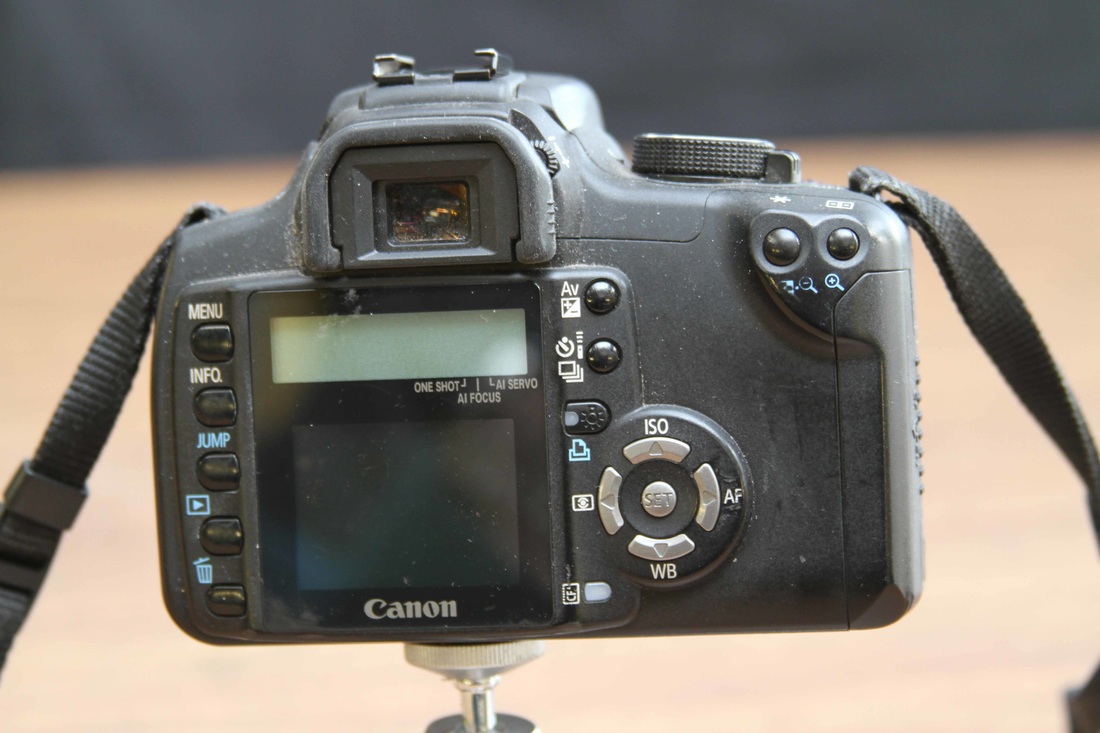
Back of a digital camera
|
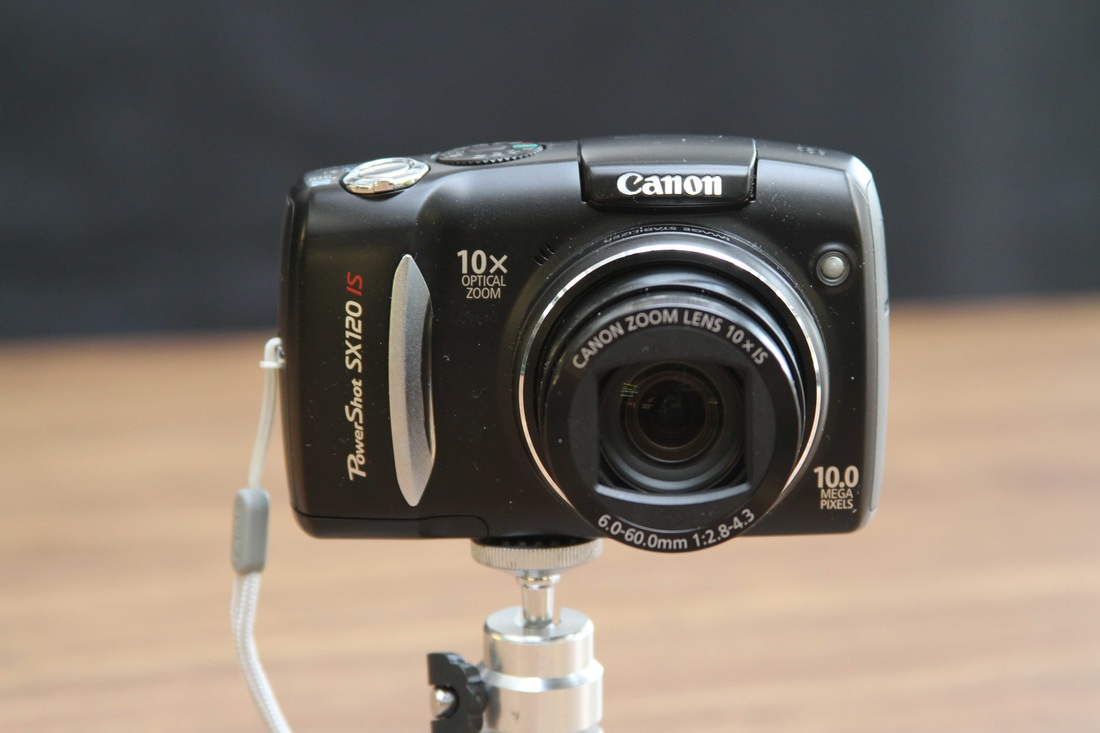
Front of a point-and-shoot camera

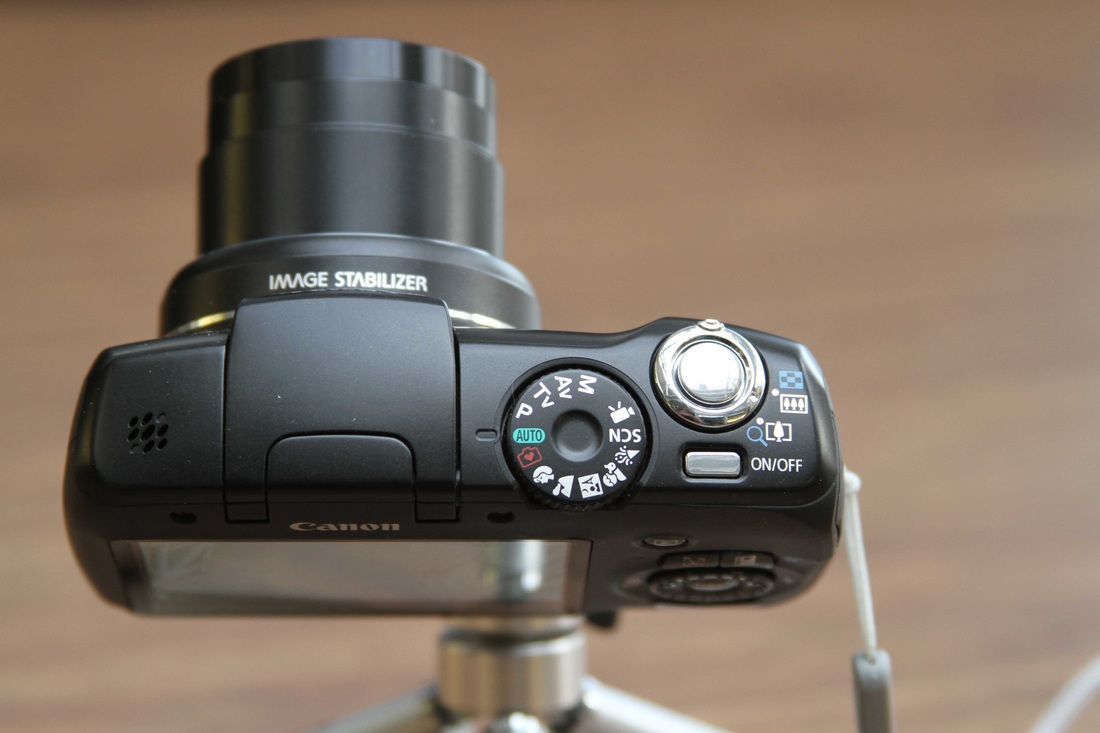
Top of a point-and-shoot camera
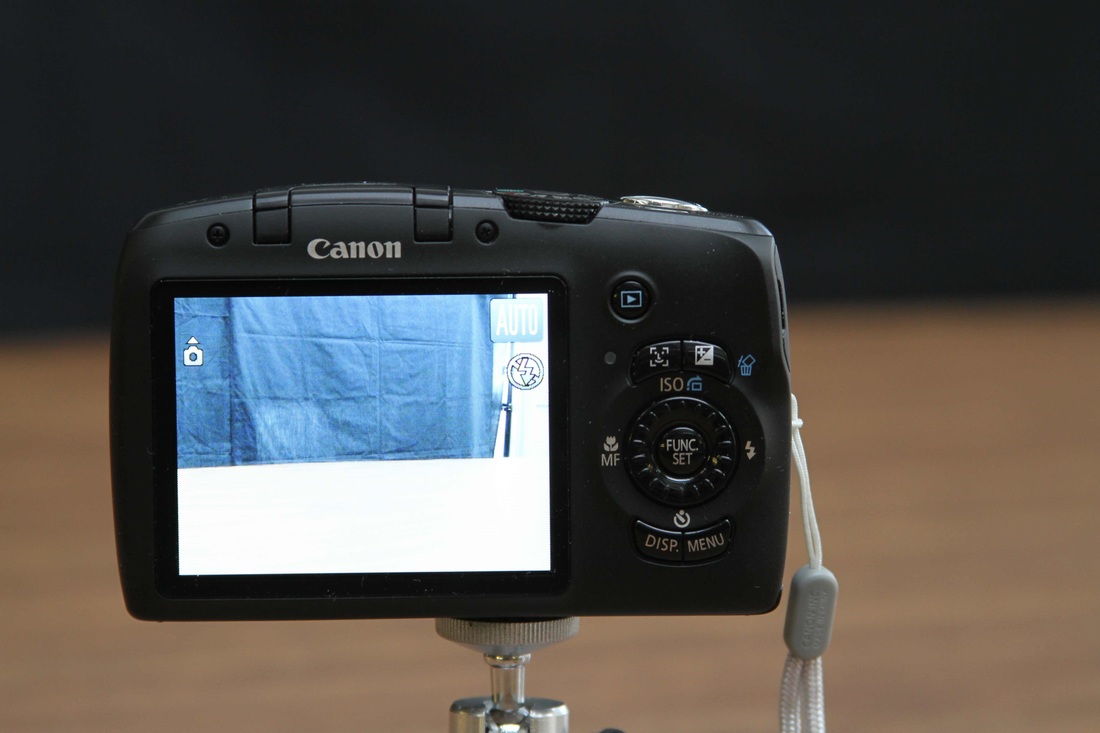
Back of a point-and-shoot camera
|
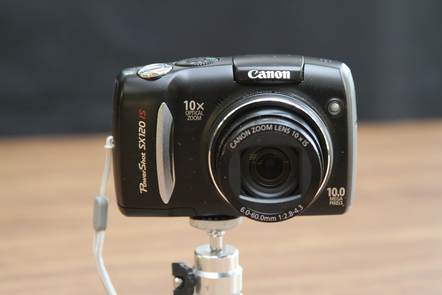
Canon SX120 IS

The mode dials on both cameras have many common settings. The dial area is set into two basic areas: the basic zone, and the creative zone.
When using the settings in the basic zone your camera is in a fully automatic mode. The camera automatically sets the shutter speed, aperture, and ISO setting that will yield the best possible picture. Most cameras will warn you if the shutter speed is too slow for the hand holding the camera. One critical mistake that most people make is ignoring this warning. The camera will take the picture if you press the shutter release button. Your result will be a picture that is blurred because you were unable to hold the camera still while exposing the picture.
The camera also sets the ƒ-stop that will work with the shutter speed that the camera selected. The aperture also controls what part of the picture is in focus because it determines the depth of field. You need to remember to press the depth of field preview button on the front of your camera to preview what will be in focus in the final picture. Most DSLR cameras have this feature while most basic point-and-shoot cameras do not.
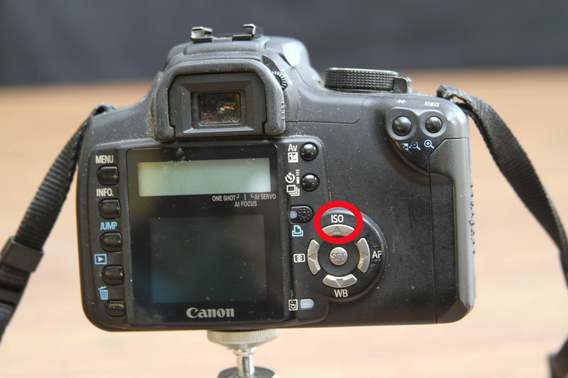
Your final setting controlled by the camera is the ISO setting. This setting controls the light sensitivity of the light sensors that record the picture image. A low ISO number like 100 requires more light than a higher ISO number like 800.
In addition to the ISO setting there are a number of basic mode settings you should be familiar with.
Full autoTo take a picture using this mode place the center auto focus (AF) point over the closest subject you want in focus. Press the shutter release button half way and the camera will focus on the selected subject. After the camera has finished focusing, press the shutter release button fully and the camera will take the picture. Remember that when using the full auto setting and all other settings in the basic zone, your camera selects the shutter speed, aperture, and ISO settings. You must also check the shutter speed to make sure it is 1/60 or faster to avoid camera shake blurring in your picture.
When using the settings in the basic zone your camera is in a fully automatic mode. The camera automatically sets the shutter speed, aperture, and ISO setting that will yield the best possible picture. Most cameras will warn you if the shutter speed is too slow for the hand holding the camera. One critical mistake that most people make is ignoring this warning. The camera will take the picture if you press the shutter release button. Your result will be a picture that is blurred because you were unable to hold the camera still while exposing the picture.
The camera also sets the ƒ-stop that will work with the shutter speed that the camera selected. The aperture also controls what part of the picture is in focus because it determines the depth of field. You need to remember to press the depth of field preview button on the front of your camera to preview what will be in focus in the final picture. Most DSLR cameras have this feature while most basic point-and-shoot cameras do not.
Your final setting controlled by the camera is the ISO setting. This setting controls the light sensitivity of the light sensors that record the picture image. A low ISO number like 100 requires more light than a higher ISO number like 800.
In addition to the ISO setting there are a number of basic mode settings you should be familiar with.
Full autoTo take a picture using this mode place the center auto focus (AF) point over the closest subject you want in focus. Press the shutter release button half way and the camera will focus on the selected subject. After the camera has finished focusing, press the shutter release button fully and the camera will take the picture. Remember that when using the full auto setting and all other settings in the basic zone, your camera selects the shutter speed, aperture, and ISO settings. You must also check the shutter speed to make sure it is 1/60 or faster to avoid camera shake blurring in your picture.
The "auto" setting
Portrait

Using this setting on your camera allows the camera to make adjustments that will produce a portrait-style picture. The camera will blur the background to help the subject in the portrait stand out more. You should position your portrait subject as far away from the background as possible. The greater the distance, the greater the background blur. Using a telephoto lens or the zoom feature on your camera allows you to be further from your subject. This will help increase background blur. The portrait setting also softens the skin tone and hair to make the final picture more pleasing. While placing the center focus button on the main subject, press the shutter release button halfway to focus the camera. While holding the button down halfway, you can recompose the picture to the desired composition and then press the rest of the way down to take the picture. In this mode the flash will automatically pop up if it is needed.
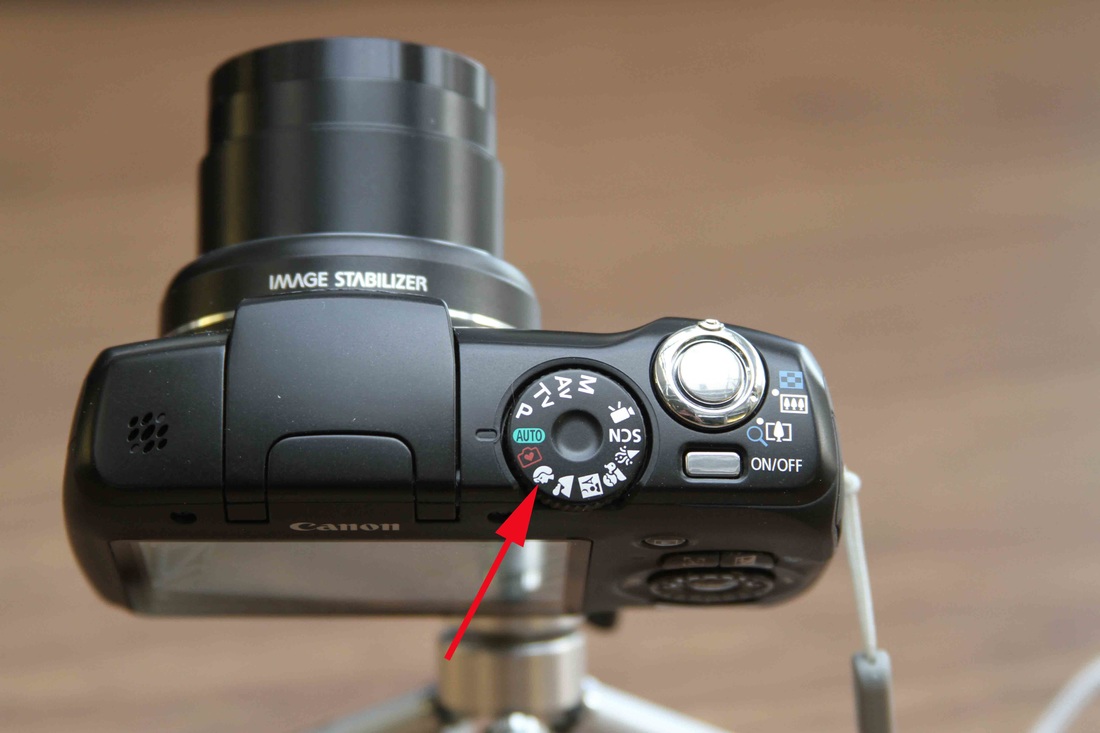
The "portrait" setting
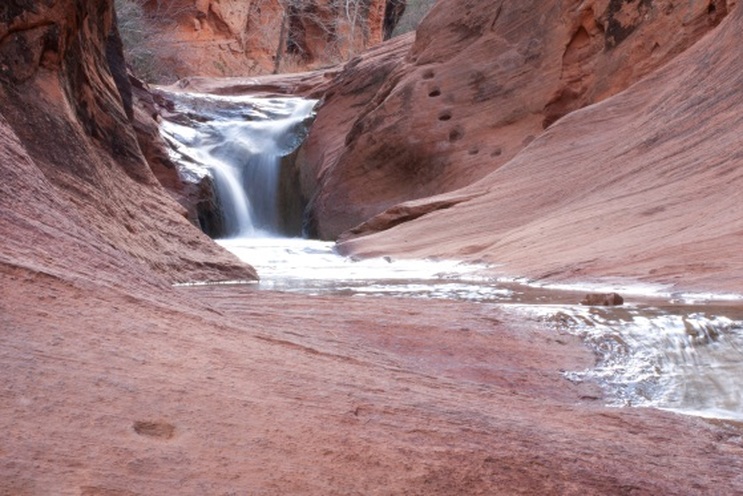
Landscape

This mode is used to photograph wide scenes and night scenes. The landscape setting also makes all parts in the scene in focus within the limitations of your camera. Also, you should use the widest angle of a telephoto lens or the widest angle setting if you do not have interchangeable lenses. In this mode the flash is disabled. This feature is helpful when shooting night scenes. When shooting night scenes, remember to use a tripod to avoid camera shake blurring of your picture.
The "landscape" setting
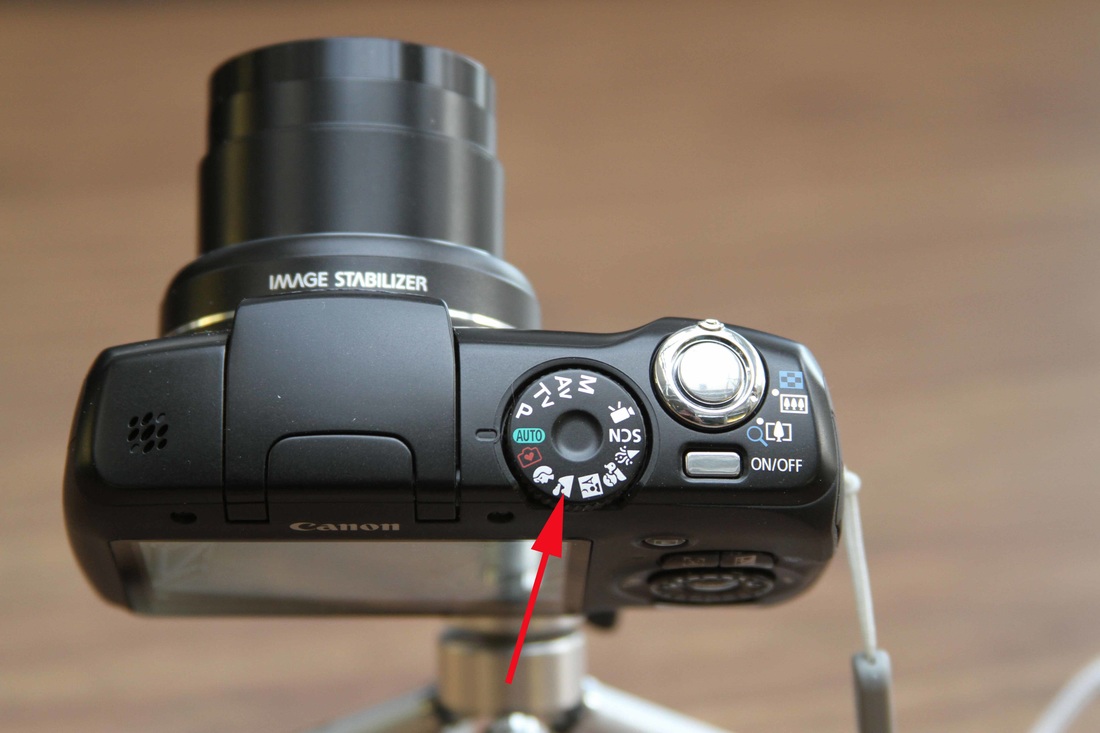
Close-up

This mode setting is good when you want to photograph small objects or flowers. Get as close to the subject as possible. Remember to not get any closer than your camera or lens will focus. Using the zoom adjustment on your camera or a telephoto lens will permit you to get closer to the subject without needing to physically move. The flash will automatically pop up if needed in this mode.
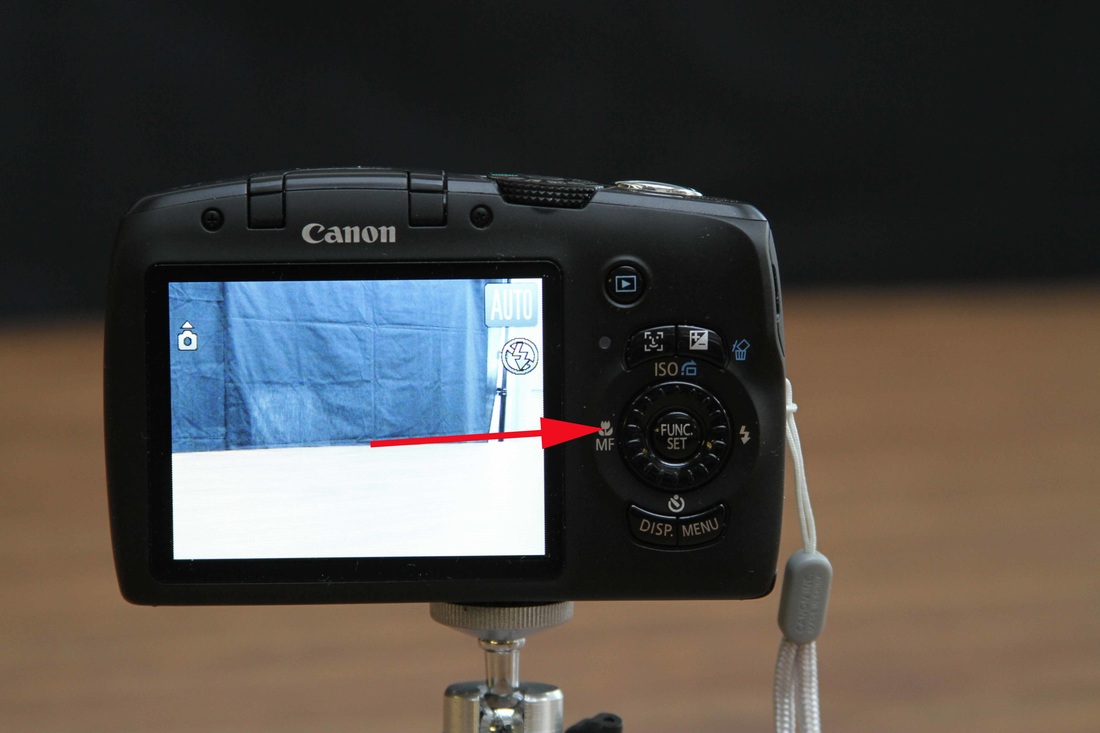
The "close up" function—"MF" stands for "manual focus"
Sports
Using this mode allows you to take pictures of moving objects. Use a telephoto lens or the zoom feature of your camera so you can be farther from your subject. This mode works best when you place the subject to be photographed in the center point and press the shutter halfway to focus. Continue to hold the shutter release button halfway so your camera will maintain focus. When you are ready to take the picture, press the button the rest of the way down. With most cameras you can hold the shutter release button down and the camera will take multiple images. In the sports mode you are usually too far away from your subject to effectively use the flash. Remember to check your shutter speed indicator in your viewfinder.
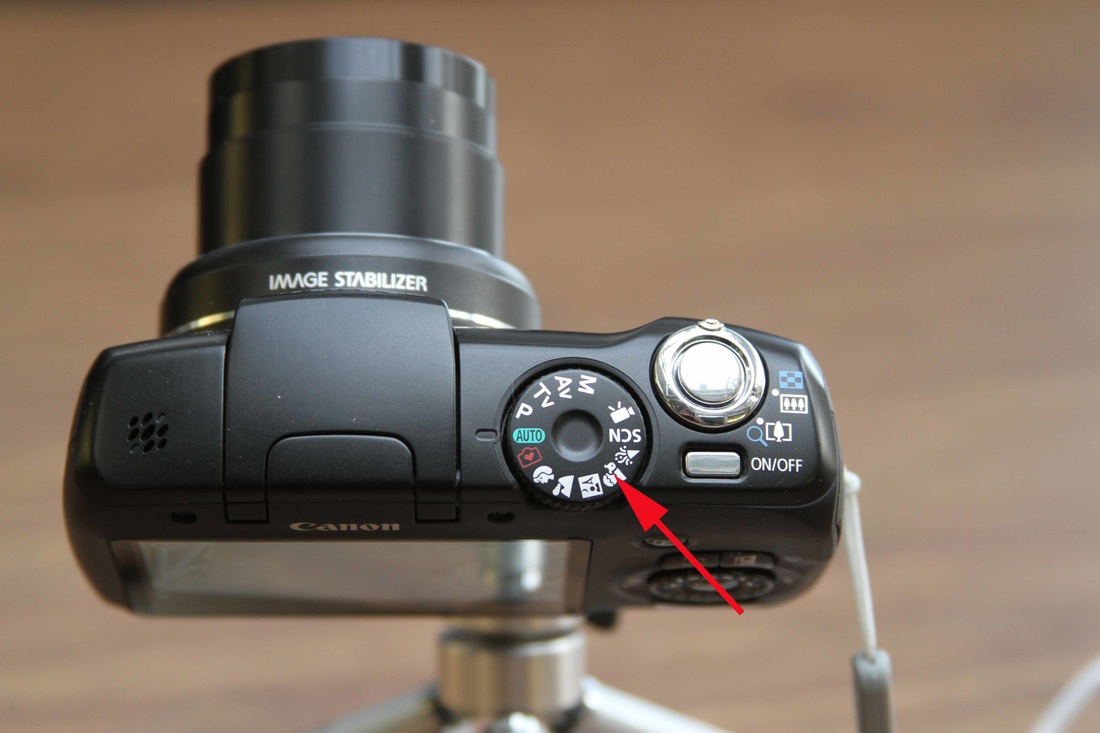
The "sports" setting
Night portrait
Many cameras have a night portrait setting. This mode is very useful when you want to take a night portrait and you want the background to be in focus. This setting allows the flash to be used to light up a close subject in a night scene. Remember that you must have the person within the effective range of your flash. This distance is usually less than 12 feet.

The "night" setting
Creative Zone Setting
When using the creative zone settings, you as the photographer take over control of the shutter speed, aperture, and ISO settings. For all settings in the creative zone you select the ISO number. If possible, use an ISO of 100. This setting will give the best results for your picture. Let’s explore the creative zone setting on the camera.
P (Program)
The camera sets the correct shutter speed and aperture to go with the selected ISO number. This setting is good when shooting a lot of pictures under similar lighting conditions. In most cameras a correct exposure will occur as long as the shutter speed and aperture settings on the view screen do not blink. If you do not like the shutter speed or aperture that the camera selects, you can change one of the settings and the camera will change the other one to keep the correct exposure.
The "P" setting
Tv (Shutter-priority)
This mode allows you the photographer to set the desired shutter speed and the camera will select the aperture that will produce a properly exposed picture. This mode is particularly useful when you want to freeze motion or blur it. A slow shutter speed (1/30 second or slower) will produce a picture with blurred motion, while a fast shutter speed (1/125 or faster) will freeze motion.
The "Tv" setting
Av (Aperture-priority)
If the depth of field is important, then this setting will allow you to select the desired ƒ-stop. The camera will then select the correct shutter speed. An aperture of ƒ4 will give a picture with a narrow depth of field, while a setting of ƒ22 will give a much larger depth of field. Remember to use the depth of field preview if your camera has this feature to ensure you are getting the desired result.

The "Av" setting
M (Manual exposure)
This mode puts you in charge of selecting the ISO setting, shutter speed and the aperture setting. This mode gives you the greatest amount of freedom. It also requires you to pay close attention to the exposure meter. The camera will take the picture at whatever you select as your aperture, shutter speed, and ISO.

The "M" setting
A-DEP (Automatic depth of field)
When you want to achieve the greatest depth of field possible; use the A-DEP setting. It is particularly useful when there are close objects and far objects that you want in focus. You may need to adjust the ISO setting to achieve maximum depth of field.
Portfolio Assignment
Project 2.1: Digital Camera Modes/Photographs
Now that you have read about the different settings in the basic zone and creative zone, it is time to look at your camera. Some camera manufacturers use different names and descriptions for their modes. Look at your camera and access the worksheet. You will need to list the modes that are included with your camera. Use your camera instruction book to describe the modes that are included in your camera.
You can locate the PDF in the course resources folder, or you can download the Digital Camera Modes PDF here.
- Take photographs following these steps:
- Take an outside scene and write down the shutter speed and ƒ stop. The picture you take should be such that there are good shadows and high lights in the scene.
- Take the same picture, changing only the shutter speed by one full stop more exposure. (If your original picture had a shutter speed of 1/125, change it to 1/60.)
- Take the same picture, changing only the shutter speed by two full stop more exposure. (If your original picture had a shutter speed of 1/125, change it to 1/30.)
- Take the same picture, changing only the shutter speed by one full stop less exposure. (If your original picture had a shutter speed of 1/125, change it to 1/250.)
- Take the same picture, changing only the shutter speed by two full stop more exposure. (If your original picture had a shutter speed of 1/125, change it to 1/500.)
- Using the zoom feature of your camera take a picture on the closest setting. (If your camera had a zoom range of 28–135, you would take this picture with the zoom set at 28) This picture should not have anything in it closer than 10 feet.
- Take the same picture after zooming in about halfway. (This would be about 75 using the 28–135 lens.) Your picture will not include as much of the scene.
- Take the same picture after zooming in the rest of the way. (This would be 135 using the 28–135 lens.) Your picture will not include as much of the scene.
