Unit 4: Technique--Digital Black and White
In this unit you will learn about the effect light has on the sensors of a digital camera and how to select the correct ISO setting for a picture. The correct use of natural and artificial light will be explained. Methods to upload pictures to editing software and the use of tags will be explored.
Learning Outcomes
- Explain the effect light has on the sensors of a digital camera. Choose the best ISO setting based on available light, flash, and equipment.
- Explain the appropriate use of natural and artificial light in photography.
- Describe the process used to upload pictures to your editing software and set up tags for use with your pictures.
- Tag your images and troubleshoot and delete all poor-quality images.
4.1: Light and the Digital Camera
Explain the effect light has on the sensors of a digital camera. Choose the best ISO setting based on available light, flash, and equipment.
|
When you take a picture with a digital camera the tones of the scene are changed into numbers. To do this most digital cameras use a CCD (change-coupled device) to change the reflected light from a scene into electronic signals. This information is stored on a removable memory card.
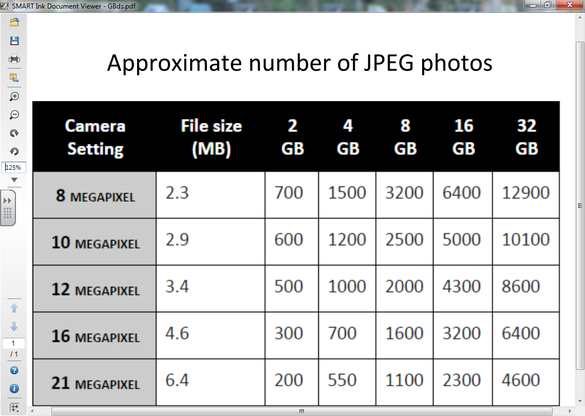
Two commonly used memory cards are the SD card and the CF card. Unlike a film camera that has a capacity on a roll of film of 24 or 36 exposures, the memory cards used today can hold hundreds of pictures on one card. With a memory card you should never run out of picture storage capacity. The chart below shows the approximate picture storage capacity of memory cards. I do not like using the 16 GB or 32 GB cards. While they hold a lot of pictures, there is the chance of misplacing the card, accidentally erasing the images, or having a card failure. If any of these happen to a nearly full card, a lot of pictures are lost. I rotate between two cards when I am shooting to give me some pictures if tragedy strikes one of my memory cards. |
ISO Setting
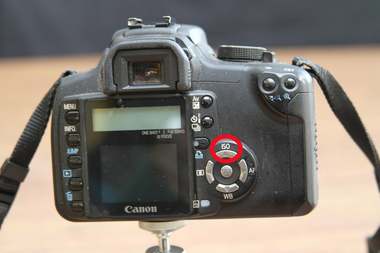 SO on camera
The ISO setting adjusts the camera sensor sensitivity to light. Increasing the ISO setting can have four side effects on the final picture. They are:
The ISO setting is adjusted along with the shutter speed and aperture to achieve the proper exposure for the desired results in your photograph. Ambient light that conveys a mood can be maintained by increasing the ISO setting and avoiding the use of a flash that would create harsh shadows. An increased ISO setting is also helpful when you want to freeze motion in a low-light shooting situation. An example of this would be a night football game.
To summarize you can use a low ISO setting when you want to get accurate contrast, color and almost no noise or pixilation. Higher ISO settings will give higher shutter speeds for action pictures, increase the range of a flash, and give better results when hand-holding low ambient light pictures.
- The noise in the picture increases
- Color saturation is slightly decreased
- Contrast is also increased
- There is an increase in the pixelation of a picture
The ISO setting is adjusted along with the shutter speed and aperture to achieve the proper exposure for the desired results in your photograph. Ambient light that conveys a mood can be maintained by increasing the ISO setting and avoiding the use of a flash that would create harsh shadows. An increased ISO setting is also helpful when you want to freeze motion in a low-light shooting situation. An example of this would be a night football game.
To summarize you can use a low ISO setting when you want to get accurate contrast, color and almost no noise or pixilation. Higher ISO settings will give higher shutter speeds for action pictures, increase the range of a flash, and give better results when hand-holding low ambient light pictures.
4.2 Natural and Artificial Light
Explain the appropriate use of natural and artificial light in photography.
Light is the most important aspect of photography. The word photography derives from Greek words meaning light writing. Light is documented onto a memory card (the negative) and then the print (the positive). The quality and characteristics of light can greatly affect the appearance of the final photograph.
Light can be intense or dim, diffused or sharp, direct or indirect, and as described in lesson 2 (color balance), can change in color (or temperature). Each of these qualities will affect your photograph.
Light can be intense or dim, diffused or sharp, direct or indirect, and as described in lesson 2 (color balance), can change in color (or temperature). Each of these qualities will affect your photograph.
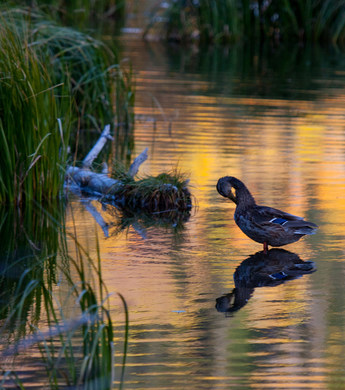
Natural Light
|
Natural light is usually considered to be outdoor sunlight. It can be diffused through clouds, be harsh and directional, create long or short shadows, and change in color depending on the time of day, weather conditions, and season. Since it is impossible to control this type of light, the photographer must work around it. It may be necessary to wait for a certain time of day for the light to change or for a cloud to diffuse the light, or perhaps to postpone your shoot for another day.
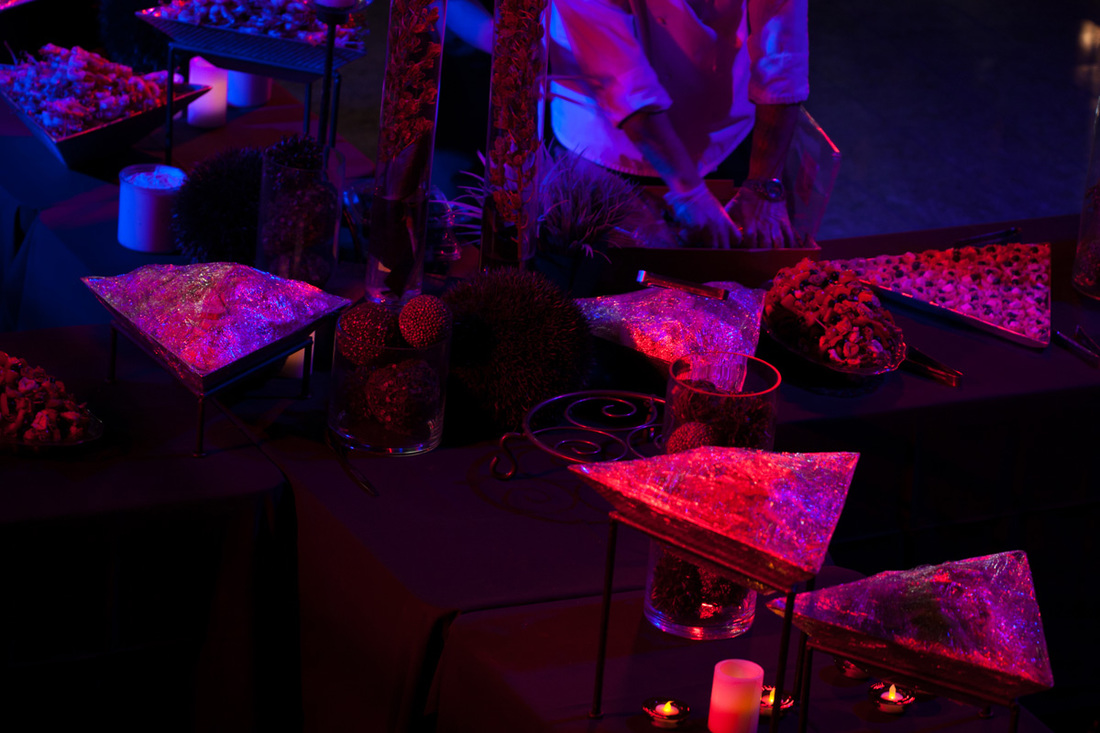
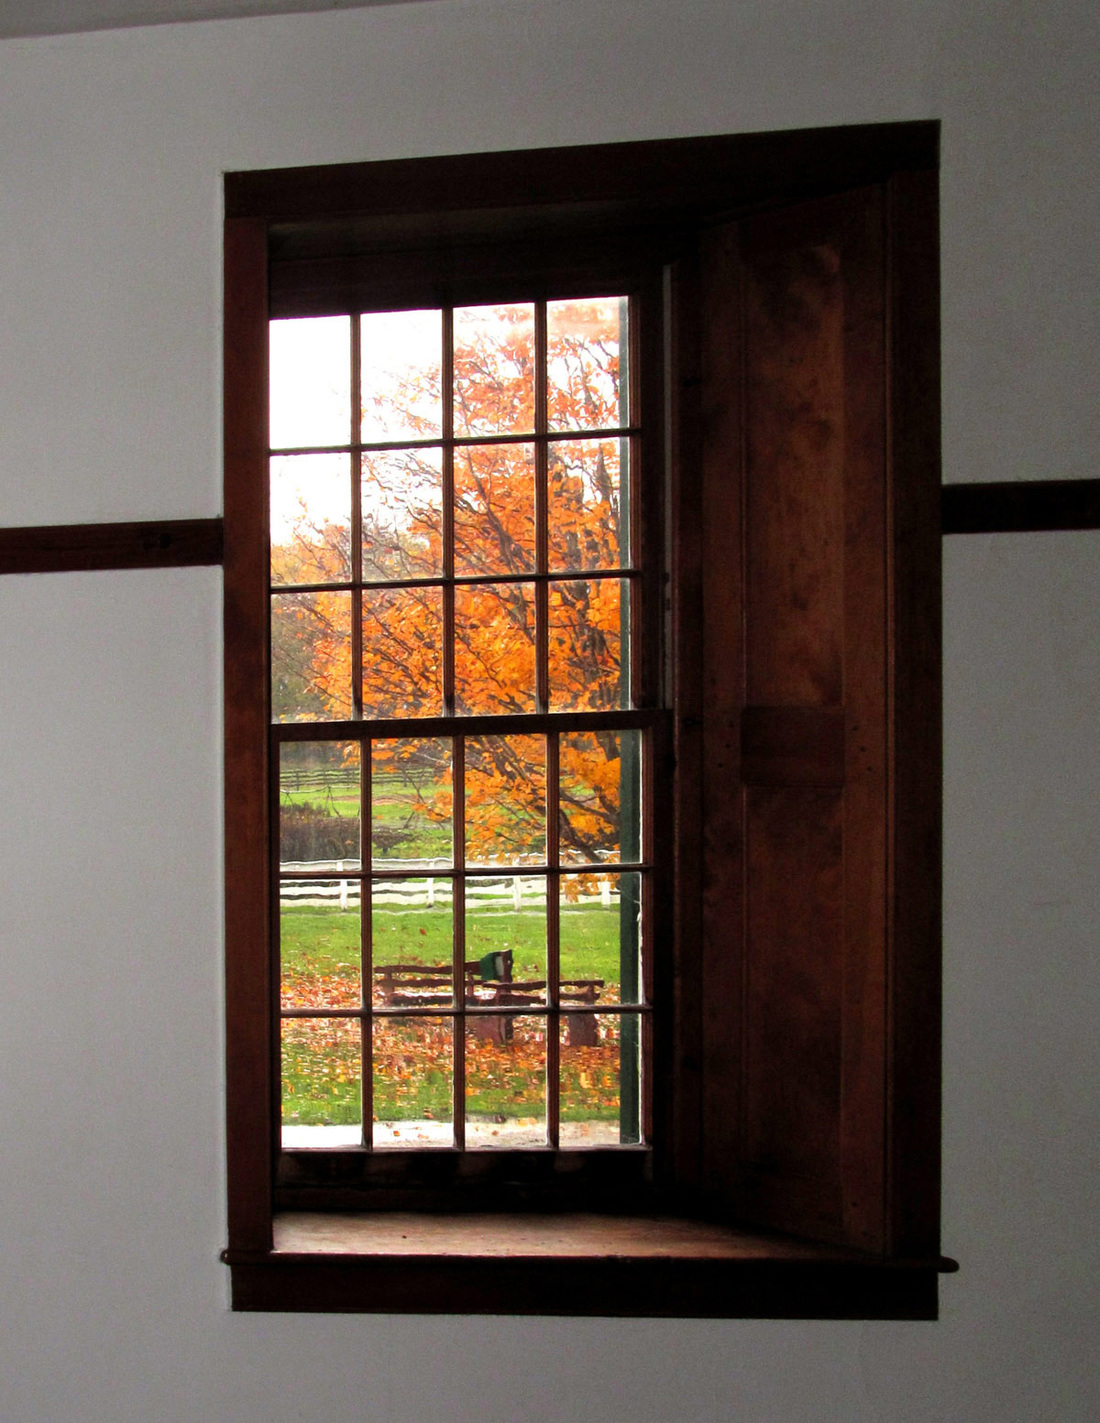
Existing LightExisting light is the light that is found at the location of your photograph; usually indoors (to distinguish it from natural light). It can be created by a variety or combination of sources, such as a window, a lamp, fluorescent lights, or reflections. It is generally not a very intense light and therefore slow shutter speeds and/or wide apertures are needed for a correct exposure. Often, use of a tripod and/or a fast speed film is required to create an acceptable photograph using existing light.
A common use of existing light is to use a northerly facing window for portraiture. The soft but directional light from a window is often desirable. Artificial LightArtificial light is used when perfect control over the lighting is desired. The photographer can use a single flash or set up an elaborate lighting scheme with spots, reflectors, and diffusers (equipment that a photographer can use to control the light).
Usually, the photographer sets up the lighting as naturally as possible so that the lighting does not seem fake to the viewer. Artificial lighting, while easily controlled, can seem complex and even daunting to set up to a beginner. Artificial lights can be continuous or flash, warm or cool, sharp or diffused, intense or dim, expensive or cheap. Note: If you decide to use a flash on your camera, be sure to read your manual that came with the unit. You will learn at what shutter speed to sync your unit and how to achieve a correct exposure. You may learn about bounce flash, fill flash, and using multiple flash units. FiltersI have discovered that the beginning students love to use filters, and the more dramatic of an effect the filter creates, the better. I have also found that those filters, most often, do nothing to help the aesthetics of their photos. So, as a warning, spend your money first on the basics that you will use frequently in photography (camera, lenses, camera case, basic filters, tripod, film, and so forth).
UV or Haze and Skylight FiltersThese filters have two purposes. The legitimate purpose of a UV or haze filter is to filter out unwanted ultraviolet light. The skylight filter is used in color photography to "warm" the blue in shadow areas. However, most photographers buy either of these filters for a more practical application. These filters, when mounted to your lens, offer protection against scratches, abrasion, and to a degree, water. It is much cheaper to replace a damaged filter than to replace an entire lens.
Neutral Density FiltersFilters of this type were discussed in lesson 1 and act as sunglasses for your camera. You would fit the filter over your lens to block out some of the excess light, allowing for slower shutter speeds or wider apertures (greater depth-of-field).
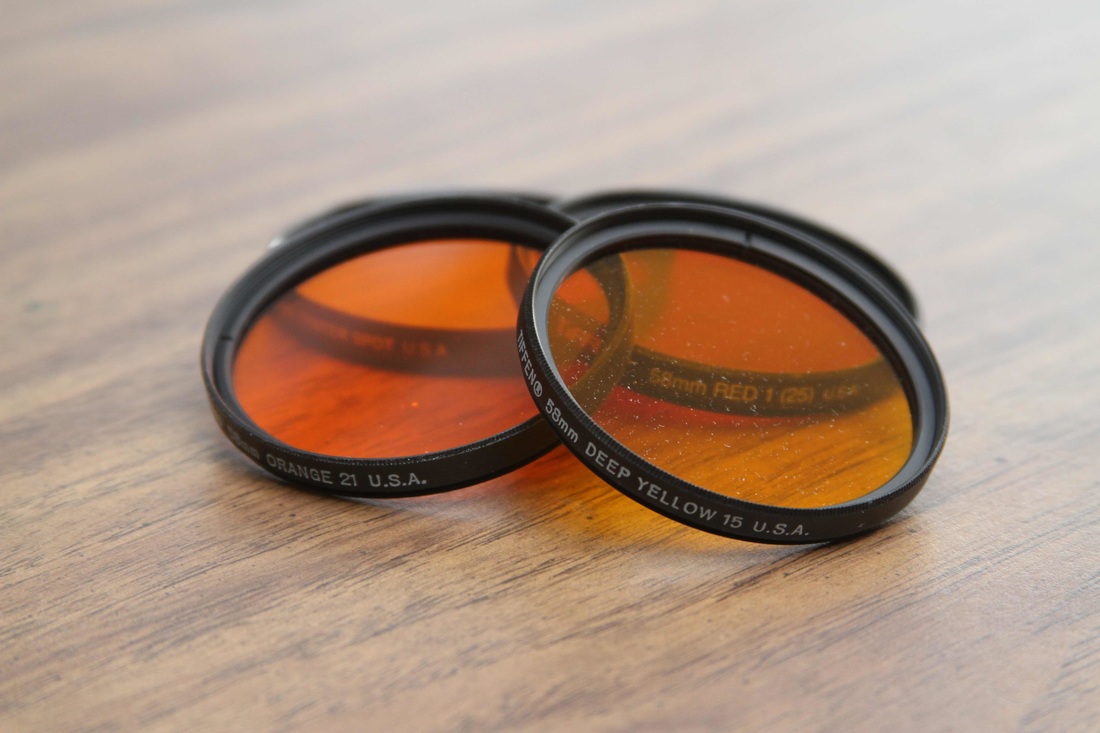
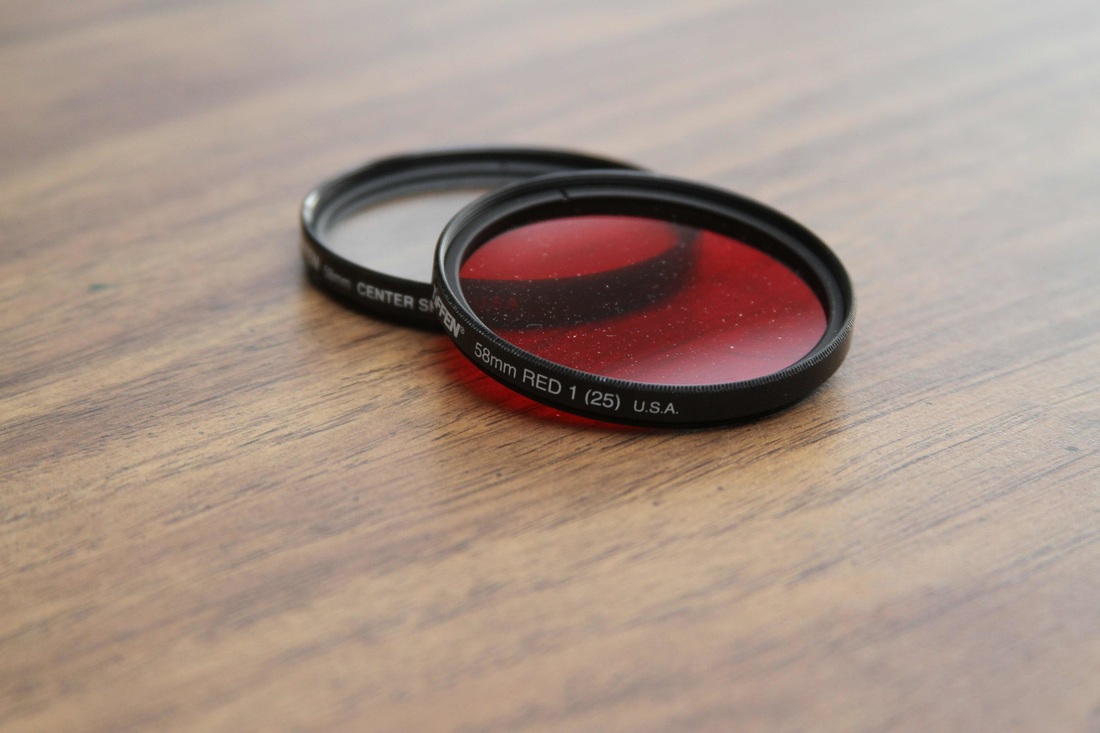
Colored Filters and How They Affect Black-and-White PicturesColored filters, when used in black-and-white photography, are known as contrast filters. These filters come in colors such as red, red-orange, orange, yellow, green, and blue. Filters tend to transmit light of the same color and block other colors. Therefore, a red rose shot using a red filter will appear lighter than normal in black-and-white and the green of the rose's foliage will appear darker.
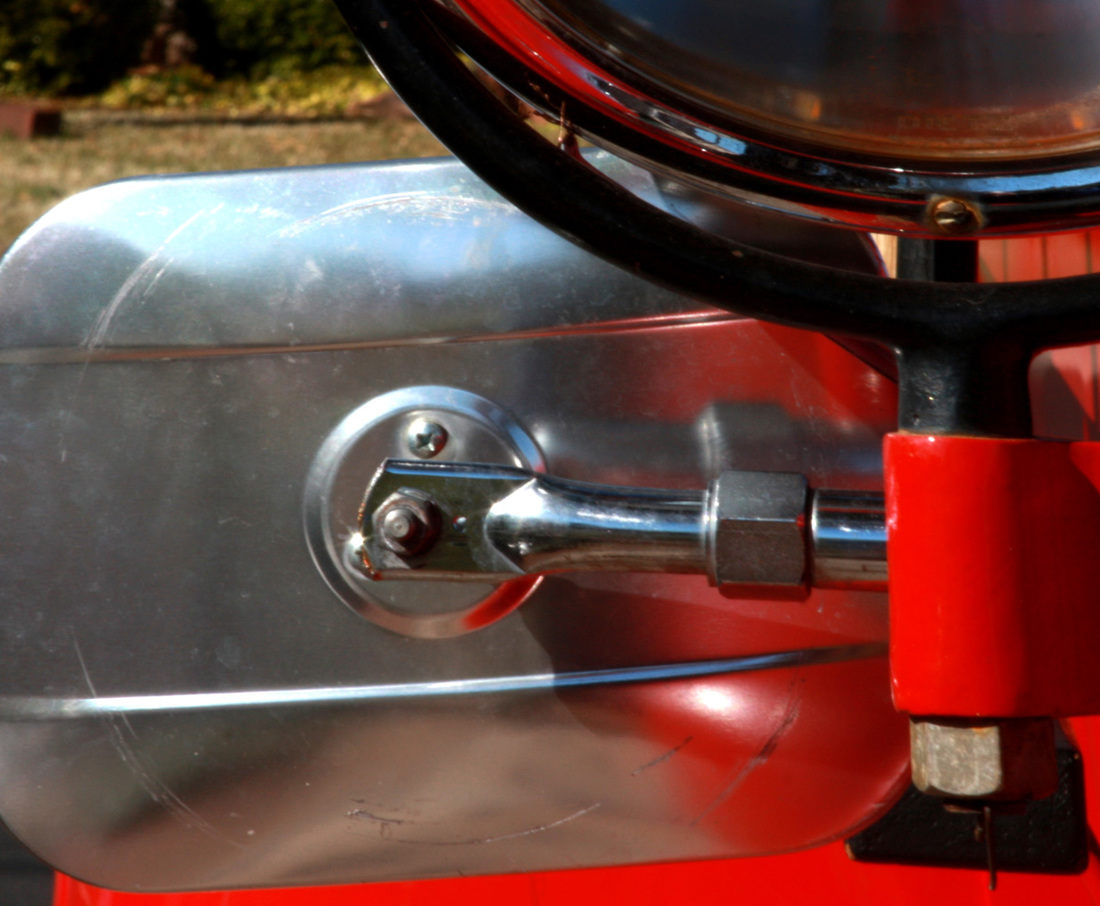
The most common application of contrast filters is to make the clouds in skies stand out better. Without a filter, the clouds against a blue sky will appear to be about the same value when printed on black-and-white paper. If you place a medium yellow filter over your lens when making the exposure, the blue sky will darken when the final print is printed. An orange filter will produce a darker sky, and a deep red filter will produce a very dramatic, almost black sky. This is because these filters block some of the light from the sky because it is blue, therefore exposing the film less on the negative. Since the negative is exposed less on the negative, the positive will show it as a darker value. Printing will be discussed in depth in lesson 4. These filters block out some of the light which reaches your film and will therefore change the exposure made to it. You will have to compensate for exposure as you add a filter to your lens. This is an easy task if you have through-the-lens metering, which means that the light is metered as it enters the lens. With through-the-lens metering you place the filter over your lens and then read your camera's internal light meter. If you do not have through-the-lens metering, you will have to adjust your exposure using the filter factor information that came with your filter. Polarizing FiltersWhen light is reflected from glass, water, metal, and so forth, it becomes polarized, or vibrates in only one direction. A polarizing filter is placed on your lens and rotated to reduce glare from reflections. It is especially helpful when shooting a scene through a window.
|
Natural light
Artificial light
Filters
Neutral density filters
Non polarizing filters
|
Polarizing filters
4.3: Uploading Pictures
Describe the process used to upload pictures to your editing software and set up tags for use with your pictures.
After taking pictures, you will want to copy them to your computer for editing. There are many good editing software programs available in the market place. For this class I will explain the process used to set up a workspace using Photoshop Elements.
Setting up Your Own Workspace
- After double clicking on the desk top icon for Photoshop Elements, open the organizer screen.
- Click the “File” dropdown at the upper left on the tool bar.
- Open “catalog”.
- Click “New” in the upper right of the catalog box.
- Type your name in the new catalog box and then click “OK.” Your name will appear in the lower left corner of the workspace. If there is more than one user of the editing software you should always look in the lower left corner to make sure you are in your workspace.
Setting up File Tags
- Find the “Key Word Tags” palette in the organizer.
- Click on the white arrow to the left of the word “People.” This will display two sub categories: “Family” and “Friends.”
- Click once on the “Family” tag. This will highlight the tag.
- Click on the green “+” at the top of the palette.
- Select the new sub-category in the drop down menu.
- Type your family name in the window. Then click “OK.”
- The new tag will appear indented as a sub category under “Family.”
- Select the green “+” again.
- Select the new sub-category in the dropdown menu.
- Type your mother’s name in the window. Then click “OK.”
- The new tag will appear indented as a sub-category under your family name.
- Click on your family name once to highlight it. (If you do not highlight the category you want the new sub-category to go under, it will become a sub-category of whatever category is highlighted.)
- Select the green “+” again.
- Select the new sub-category in the dropdown menu.
- Type your father’s name in the window. Then click “OK.”
- The new tag will appear indented as a sub-category under your family name.
- Repeat this process for all family members.
- Next, create tags for any friends you may want to photograph.
Copying Your Pictures to Your Computer Workspace
- After opening your workspace in the organizer connect your pictures to your computer. There are several ways to do this.
- Attach your camera to your computer using a USB cable.
- Place your memory card from your camera into a memory card reader and plug it into a USB port on your computer.
- Plug your camera memory card directly into your computer.
- Select the “File” dropdown menu at the top left.
- Click “Get Photos and Videos.”
- Select “From Camera or Card Reader.”
- From the “Get Photos From,” select the choice that fits how you are attaching your pictures to the computer.
- After the “Get Photos” button at the bottom of the screen is highlighted, click it.
- After the pictures are copied select “Yes.” Then click “OK” in the elements organizer pop-up.
- Your pictures are now in the organizer.
4.4: Tagging Images
Tag your images and troubleshoot and delete all poor-quality images.
Tagging Your Pictures
Tagging an Individual Picture
- Single-click the picture to be tagged. A blue border will appear around the selected picture.
- Left-click and hold the tag that is to be placed on the chosen picture. Drag the tag to the selected picture.
- Repeat this process to tag all pictures.
- A picture may be tagged with multiple tags. It may be tagged for each individual in the picture. The picture may also be tagged with the location and the event.
Tagging a Group of Pictures with the Same Tag
- Single-click the first picture in a group to be tagged. The blue border will appear around the selected picture.
- Place the cursor over the last picture to be tagged.
- Hold down the shift key while single clicking the last picture. All the pictures to be tagged with the same tag will now have the blue border.
- Left-click and hold the desired tag and drag it over one of the selected pictures. All the pictures with the blue border will be tagged with the same tag.
Tagging Multiple Pictures That Are Not Next to Each Other with the Same Tag
- Single click the first picture in a group to be tagged. The blue border will appear around the selected picture.
- While holding down the CTRL key, left-click each picture you want to receive the same tag. The blue border will appear around the selected picture.
- Left-click and hold the desired tag and drag it over one of the selected pictures. All the pictures with the blue border will be tagged with the same tag.
Organizing Your Photos
- After you have finished copying your pictures into your workspace in the organizer and tagging them you are ready to look at them. Start with the first picture.
- Double-click on the image and it will enlarge to full screen.
- Determine if the picture is in focus. If it is not in focus, right-click on the picture. From the pop-up menu, select the delete from catalog icon. Click the box that also deletes the selected item from the hard disk, then click “OK.”
- Repeat this process for all pictures that are new to your file.
Adding Captions to Your Photos
- Click the icon at the bottom of the picture that says, “Click here to add caption.”
- Add notes about the picture. This is easiest to do while you can still remember details about the picture.
Unit 4 Portfolio Assignment
- Take ten pictures of family members. There should be more than two pictures of at least one family member.
- Take ten pictures of friends. There should be more than two pictures of at least one friend that you photograph.
- Take ten pictures of animals. There should be more than two pictures of at least one of the animals that you take pictures of.
- Take ten pictures of anything. There should be more than two pictures of at least one of the subjects photographed for the anything part of the assignment.
These photos will be turned in as part of the Second Portfolio Submission after Unit 4.
PORTFOLIO ASSIGNMENT
- Two pictures illustrating the rule of thirds. One picture landscape and one portrait.
- One picture with a low horizon.
- One picture with a high horizon.
- Select two elements of design and take a picture that illustrates each. (Two pictures)
- Select two principles of design and take a picture that illustrates each. (Two pictures)
- Take ten pictures of family members. There should be more than two pictures of at least one family member.
- Take ten pictures of friends. There should be more than two pictures of at least one friend that you photograph.
- Take ten pictures of animals. There should be more than two pictures of at least one of the animals that you take pictures of.
- Take ten pictures of anything. There should be more than two pictures of at least one of the subjects photographed for the anything part of the assignment.
- After taking these forty pictures, copy them into your workspace. Tag the pictures. You may want to take more than forty pictures so you will have at least forty left after you delete any out-of-focus pictures.
- When you are ready to upload and submit all the parts of this portfolio, use the instructions on submitting an assignment using Google Drive to upload the files
