Unit 5: Introduction to Editing
You will need to have access to a computer with photograph editing software to complete the assignments for the rest of the course. The terms and images shown in this course are from Adobe Photoshop Elements. You will also need a digital camera.
Learning Outcomes
- Use various tags to organize your pictures.
- Edit and improve your images by using zoom, crop, levels, contrast, and brightness.
- Save your pictures in a version set.
- Edit and improve your images using marquee, lassos, magic wand, clone stamp, and spot healing brush, and by fixing camera distortion.
Portfolio Assignment
Fill out the chart to tell what edits you used to improve or edit 10 of the 20 images you tagged in the activity for this lesson. Print the before and after pictures to demonstrate your editing skills.
You can find the needed worksheet titled “Editing Worksheet Portfolio Assignment” in the Course Resources folder.
5.1: Organizing with Tags
Use various tags to organize your pictures.
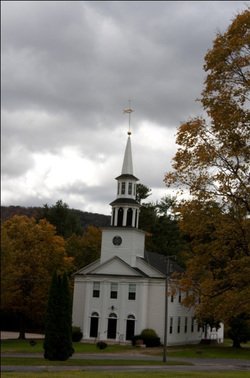 Church
In the previous lesson you learned how to import images into your Organizer. Next we’ll use different tags to catalog your pictures. One picture may have several different tags.
Here we have two pictures. The first picture of the church could be given several tags, like “church,” “New England trip 2010,” or “fall colors.” The picture of the three children could also be given several tags, perhaps a tag for each child or “Halloween 2010.” Using different tags makes it easier to locate the desired picture when it is needed.
When my father-in-law passed away in 2009 I was asked to put together a slideshow with pictures taken of him during his lifetime. Besides scanning all the pictures his children wanted in the show, I was asked to include recent pictures of his life and activities that I had taken over the past several years. My computer picture files had over 19,000 exposures. It would have taken many hours to locate all the pictures with my father-in-law in them.
Because I took the time to tag pictures I was able to see the collection of his pictures in a matter of seconds. With one click of the mouse, the program searched and found 284 pictures. It was then up to the family to select the pictures they wanted to include. I created a new tag with his name and the word slide show that included the sub-category for the pictures that were to be included in the slide show.
If you take the time to tag all pictures with good descriptive tags, you will have a much easier time retrieving your pictures when needed. The general rule of thumb that I use when tagging a picture is this. Tag for 1) each person of importance in the picture, 2) the event—I will often include a year in this tag, 3) the location (where the picture was taken), and 4) any other description that might be helpful in retrieving the picture.
As a student in a photography class, another important group of tags that you might apply to pictures would be for the assignments for the class. The first tag might be “Art 061.” Sub category tags might be for the individual assignments for the class.
Activity
Use your editing software to tag at least 20 pictures that you have taken. Each picture should have a minimum of two tags. Fill out this chart (or access it in the Course Resources folder) with the tags you used for each of the 20 pictures. Include a thumbnail of the 20 pictures.
5.2: Editing and Improving Images
Edit and improve your images by using zoom, crop, levels, contrast, and brightness.
Zoom In/Zoom Out
After opening the edit program with the selected picture, you can zoom in and out using two different options. The first method is to click on the magnifying glass in the left tool panel. This will allow you to zoom in or out on a desired portion of the picture using the options bar at the top of the picture.
The second method is place the cursor over the picture and hold down the CTRL key while pressing the + key. Each time you repeat this step the picture will continue to zoom in closer. This will enable you to work on detail areas of your picture while editing a picture. To zoom out hold down the CTRL key while pressing the – key. Repeating this process will continue the zoom out. Zooming in is also helpful when you want to check the focus of a picture. Many other editing features are easier to use after you have zoomed in on a smaller portion of a picture.
The second method is place the cursor over the picture and hold down the CTRL key while pressing the + key. Each time you repeat this step the picture will continue to zoom in closer. This will enable you to work on detail areas of your picture while editing a picture. To zoom out hold down the CTRL key while pressing the – key. Repeating this process will continue the zoom out. Zooming in is also helpful when you want to check the focus of a picture. Many other editing features are easier to use after you have zoomed in on a smaller portion of a picture.
Crop Tool
The crop tool in Photoshop Elements 8 is located in the left-side tool panel. It looks like two overlapping L shapes with one upside down. After selecting the crop tool, left-click the tool in the upper left corner of the picture where you want the crop to begin. While holding down the left-click button on your mouse, drag the tool down and to the right until you have your picture cropped the way you would like it. Let go of the left-click on the mouse. The area outside the crop marquee is darkened to better highlight the area in the picture that is being cropped.
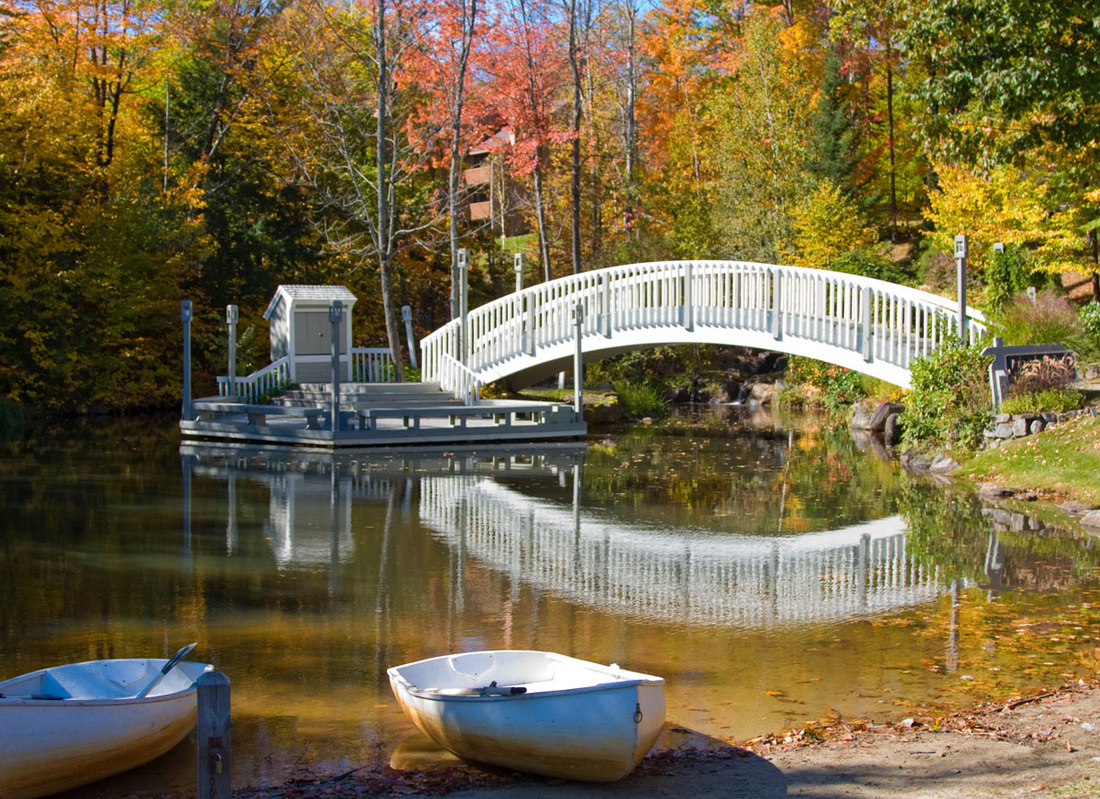
Photo of a bridge across a lake before cropping.
You can increase or decrease the area of the picture that is being cropped by left click and hold on the edge marks on the marquee. When the desired crop has been selected, the crop can be completed by one of three methods. They are 1) click the green check at the bottom right of the cropped area, 2) press enter or 3) double-click inside the cropped area. The cropping of a picture should be the last step in the editing process before the edited version is saved. If you crop the picture early in the editing process you may need more picture area if you move the horizon line.
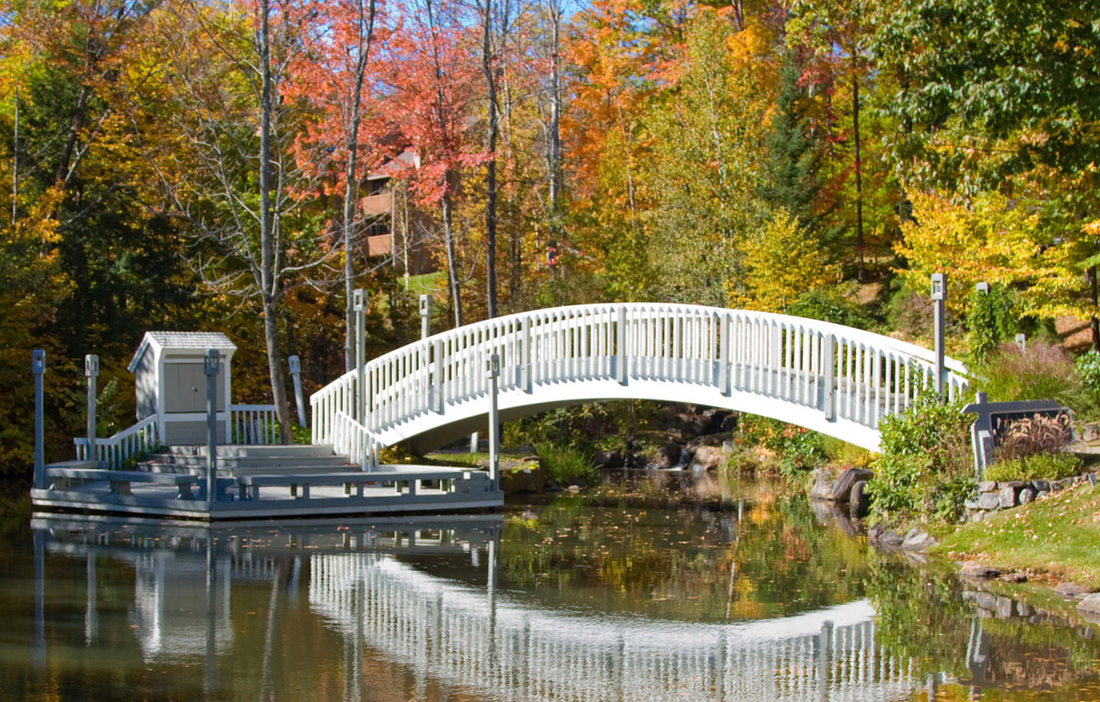
Same image with about 25% material cropped out
Levels
The levels tool is very powerful. It does more to improve your picture than any other tool. The levels adjustment should be the first adjustment made during the editing process. To get to the levels tool select enhance in the drop down tool bar. From the dropdown panel select “Adjust Lighting.” The final step is to select levels from the panel to the right. A screen with a histogram will appear. Under the histogram there is a black spade. Drag it to the right until the histogram slopes upward. Next, drag the white spade to the left until it begins to slope up. The gray spade in the middle can also be adjusted to control the middle tones. I generally do not move this middle slider. When using the level adjustment, make sure the Preview square is checked. This will make it so you can see the result of the level adjustment as soon as you make the adjustment. When you are satisfied, click “OK.” This will finalize your levels adjustments.
Contrast
There are two main methods to adjust the contrast in your picture. The quickest method is to use the “Auto Contrast” in the “Enhance” dropdown menu. This will adjust the overall contrast in a picture. The auto contrast does not change the color in the picture. The original color balance in the picture is maintained. When using the levels adjustment the color balance can be changed. If a picture has an overall hazy appearance, the auto contrast adjustment helps to reduce the haze appearance.
The second method used to control contrast is also found in the “Enhance” dropdown panel. Select “Adjust Lighting” and then “Brightness/Contrast.” This will open a screen that has a slider for contrast. Using the contrast slider gives you greater control of the amount of contrast that is added or subtracted from the original picture. I like to use the auto contrast to see the suggestion of the program for contrast adjustment. I then cancel it and go to the manual contrast adjustment and select the contrast adjustment that I prefer for the image.
The second method used to control contrast is also found in the “Enhance” dropdown panel. Select “Adjust Lighting” and then “Brightness/Contrast.” This will open a screen that has a slider for contrast. Using the contrast slider gives you greater control of the amount of contrast that is added or subtracted from the original picture. I like to use the auto contrast to see the suggestion of the program for contrast adjustment. I then cancel it and go to the manual contrast adjustment and select the contrast adjustment that I prefer for the image.
Shadows/Highlights
The shadows/highlights adjustment is much better than the brightness adjustment slider to improve the brightness of a photograph. The brightness adjustment makes the change to the entire image. The shadows/highlights adjustment breaks the picture down into three areas, highlights, shadows, and mid-tone contrast. Each of these three areas are then individually changed. The shadow/highlight adjustment is located in the “Enhance” dropdown menu in the “Adjust lighting” section. The program makes a correction in each category. You then make any additional changes by moving the sliders. When you are satisfied with your adjustments, click “OK.”
5.3: Saving Versions Sets
Save your pictures in a version set.
After you have completed the editing process, you will need to save your edit back into the organizer. When saving an edited picture, you want to save it into a version set so it will be in the same location as the original image. The Photoshop Elements program will stack your new picture on top of the original image. If you perform several different editing sessions with the same image, the program will continue to stack the newest edit on top of the previous edits. On the right side of the version set stack is an arrow. If you click the arrow the images will be unstacked with the newest image to the left and the original image to the far right of the set.
Steps to Save an Image in a Version Set
- Click “File” in the dropdown menu bar at the top.
- Click “Save” from the menu.
- In the file name window, make sure that it says that the image is edited. You may also change the file name to be anything you would like. I would make sure that the word “edited” is in the new name. If you plan to use this image for more edits it is important to remember that each new file name must be different.
- In the format window, it must say “JPEG (*JPEG.*JPEG.*JPE).” If it does not, click the drop down arrow at the right of the window and select “JPEG (*JPEG.*JPEG.*JPE).”
- In the Save Options Organize: make sure the “Include in the Elements Organizer” and the “Save in Version Set with Original” boxes are both checked.
- Click “Save.”
- In the Photoshop Elements editor dialog box click “OK.”
- In the “JPEG Options” box, click “OK.”
- After the image is saved click the X in the upper right corner to exit the edit part of the program and return to the organizer.
- You can now click the arrow at the right side of the new picture to open the version set.
- You do not need to close the version set unless you want to. Any open version sets will close when you exit the program.
5.4: Editing and Improving Images
Edit and improve your images by using marquee, lassos, magic wand, clone stamp, and spot healing brush, and by fixing camera distortion.
Marquee
There are two marquee tools. One is rectangular and the other is elliptical. The marquee tool is in the tool panel at the left of the edit screen. It looks like a dotted square. There is an arrow in the lower right corner that you can right click on. The two marquee tools will appear. Click on the one you want to use. The marquee tools can be used to select areas of a picture to do additional editing. This tool can also be used to select areas of a picture that can be moved into another picture or to duplicate.
Lassos
Because everything we need to capture in a marquee is not elliptical or rectangular Elements has provided the lasso tool. This tool allows you to freeform select the area of the picture to be included. Select the lasso from the tools panel. It is right below the marquee tool. It is the one that looks like a rope in the form of a lasso. Select the place you want to begin and trace the outline of the subject you want included from your original image. With practice, you can become very proficient at the lasso tool.
Magic Wand
The magic wand tool is one of the original tools of Photoshop Elements. It is used to select a portion of your image by clicking the wand on the image in an area you want included. When you click on the selection, the program evaluates the pixel you clicked on and includes all pixels that are within 16 levels of brightness above and 16 levels below the selected pixel. This conforms to the default setting of 32 in the tolerance section of the options bar just above your picture. If you do not get the desired portion of your picture included in the selection, change the tolerance setting. Increase it if you want to include more or decrease it if you want to include less. This process is trial and error. The more you use the magic wand the better you will become at using it.
One of the truly nice features in Photoshop is the undo feature in the “Edit” dropdown menu. You can work backwards undoing as many of your edit steps as you would like. Try performing several different edits. Next go into the undo process and watch your picture change back, one mouse click at a time. This is particularly helpful when you finish an edit step and then decide you went one edit too many.
One of the truly nice features in Photoshop is the undo feature in the “Edit” dropdown menu. You can work backwards undoing as many of your edit steps as you would like. Try performing several different edits. Next go into the undo process and watch your picture change back, one mouse click at a time. This is particularly helpful when you finish an edit step and then decide you went one edit too many.
Clone Stamp
The clone stamp tool is also located in the tools panel to the left of the picture you are editing. The clone stamp tool can be used to repair parts of the picture where you need to copy over a part of the picture. One example of this might be to eliminate the date/time stamp from a picture. (You should always turn this feature off on your camera. The camera and your computer store this information electronically as long as you have the clock correctly set on your camera.) This feature can also be used to copy a portion of a picture to another part of the picture. (You may want to eliminate an old boy- or girlfriend from a great picture of you.)
Select the clone stamp tool from the tools panel. In the options bar set the size of the area to be cloned. The setting is in pixels. Next click on the zoom in/zoom out tool and enlarge the picture so you can see the area to be repaired or be copied from and to. After you have enlarged the area to be worked on, change back to the clone stamp. Move the cursor over the middle of the area you want to copy. Hold down the ALT key while left clicking the mouse. This will mark the spot where the copy will be taken from. Next move the cursor to the place you want to copy to. While holding down the left click drag the cursor over the area you want the cloned part of the picture to appear in. Practice using this tool. It will make it possible to remove acne and other blemishes.
Select the clone stamp tool from the tools panel. In the options bar set the size of the area to be cloned. The setting is in pixels. Next click on the zoom in/zoom out tool and enlarge the picture so you can see the area to be repaired or be copied from and to. After you have enlarged the area to be worked on, change back to the clone stamp. Move the cursor over the middle of the area you want to copy. Hold down the ALT key while left clicking the mouse. This will mark the spot where the copy will be taken from. Next move the cursor to the place you want to copy to. While holding down the left click drag the cursor over the area you want the cloned part of the picture to appear in. Practice using this tool. It will make it possible to remove acne and other blemishes.
Spot Healing Brush
The spot healing brush is very similar to the clone stamp. They are both used to repair flaws in a picture. The spot healing brush however does a much better job at repairing a photograph. The clone stamp copies the area being copied exactly as it is. The spot healing brush takes the pixels from the area being copied and blends them into the area being repaired. Consideration is given to the tones, highlights, and shadow areas that are receiving the copied pixels.
The following steps should be followed to use the spot healing brush after you have opened the picture to be repaired in full edit. 1) From the options bar select the size of the brush to be used. 2) For now leave all the other settings at the default. 3) Place the cursor over the area you want to copy from and left click while holding down the ALT key. 4) Either click on the areas to be repaired or drag the cursor over the area in need of repair. (Remember, if you go too far you can always use the undo command to back up and start again.
The following steps should be followed to use the spot healing brush after you have opened the picture to be repaired in full edit. 1) From the options bar select the size of the brush to be used. 2) For now leave all the other settings at the default. 3) Place the cursor over the area you want to copy from and left click while holding down the ALT key. 4) Either click on the areas to be repaired or drag the cursor over the area in need of repair. (Remember, if you go too far you can always use the undo command to back up and start again.
Fixing Camera Distortion
When taking pictures, it is important to make sure that your horizon line is level. Usually it is also parallel to the top and bottom of your picture. Another common problem is converging or diverging parallel lines. This problem is most common when taking architectural pictures. The fixing camera distortion feature is very helpful when you need to make these adjustments. This editing tool is not found in the tools panel. It is part of the “Filter” dropdown menu. We will only look at a few of the editing tools that are present in the fixing camera distortion tool.
The first thing you will notice is the grid pattern that is over laid onto the picture. This grid is very helpful when leveling the horizon line. We will start with the “Angle” setting near the bottom. There are two ways to adjust the horizon. The first is a circle with a radius line that points up to 12 on an imaginary clock. This represents 0° or 360°. You can click and drag this radius line to the right or left to make the horizon parallel to the grid lines. You will notice that as you move the radius line, the number in the window to the right changes to be the degree measure of the change in the radius. The other method to change the degree is to use the degree window and select the new degree of the change of the radius. Keep in mind that when you move the radius to the left, the degree increases. When you move the radius to the right, the degree decreases from 360°. Remember to also look at vertical lines when changing the horizon. They should remain parallel to the sides of the picture.
The next feature is the perspective control. There are two sliders that can be used in this edit. The top slider controls vertical perspective, while the lower slider controls the horizontal perspective. Select a picture with strong horizontal and vertical lines and play around with these different tools that help to fix horizontal and vertical lines in your pictures. As you can see, there is a checkered pattern in the border area of the picture. After you have clicked “OK,” this checkered pattern will be present. This is one of the main reasons why I always wait until I am finished all other editing before cropping a picture.
